|
Introduction
Cutting Tails
Cutting Pins
Conclusion
|
Introduction
The AngleMag was invented by Jeff Snell
in Australia and is the current state-of-the-art magnetic saw guide. The
AngleMag is extremely versatile and can be used not only to saw dovetails,
but also to help out in a whole bunch of applications in which accurate
sawing is needed. It even allows you to get perfect square results, and
it can function as a high tech, extremely versatile mitre box.
Click here to order an AngleMag
|
 |
In
the heady times of 19th century London, when cabinet shops turned
out thousands of chests, bureaus, and other furniture requiring
dovetails and other joints, a cabinetmaker was trained to mark out,
saw accurately, and make tight joints as second nature. There are
three reasons they could do this: first, an apprentice who couldn't
get the hang of it quickly would get fired or find another line
of work. Second, cabinetmakers in big shops had areas of specialties,
so the apprentices who cut the joints probably did little else.
Finally, practice makes perfect - after the first few thousand joints
you get good at it.
But
nowadays many woodworkers have trouble with dovetailing. You need
to lay out a joint and then saw it accurately. Sawing is the part
that most people have trouble with. Sawing dovetails freehand can
be learned with practice and attention. We recommend it for everyone.
But until you have this skill - or if you're doing extensive dovetailing
on a particular project, a magnetic saw guide is the easiest way
to ensure consistent results and get whatever spacing or custom
look you want. You will still have to accurately lay out the joint,
you will still have to chop the dovetails, but the hardest step
- sawing consistent straight lines - will be a thousand times easier.
|
| For
the purposes of this instruction we will concentrate on through dovetailing.
We don't want to go into the science of dovetailing - there are better
guides then this, and the instruction manual for the AngleMag gives
detailed instructions on all the different setups you can use for
many kinds of joinery. What we want to do is show you how to use the
AngleMag and point out the basics of dovetailing. Most of what we
talk about applies to all sorts of joinery and chisel use, but here
we are just tapping into the features of the AngleMag. |
|
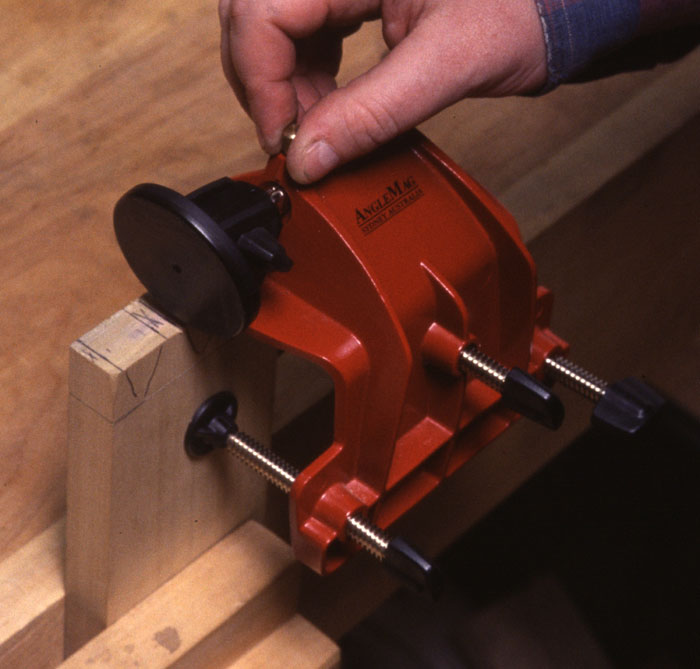
The
Anatomy of the AngleMag
|
|
The
AngleMag is very simple in concept. It consists of an aluminum body
that clamps onto the work. For wide wood, you can use all three
clamps; for narrower stock, even a single clamp works well. The
important thing is that the AngleMag is clamped consistently with
the body flush down onto the end of the work. You can clamp wood
up to 2" thick, which adds a lot to its versatility. The body of
the AngleMag holds the guide shaft. The guide shaft is a rod with
grooves milled into it and a magnetic guide at one end. The angle
of the guide can be adjusted from straight across to 45 degrees.
For dovetailing, you set the guide to whatever angle you want your
dovetails to be and lock it in place.
|
|
To
position the guide precisely where you want it to cut, you move
the rod and then lock it in place using the two small thumbscrews
on the top of the body, then tighten the thumbscrews into one of
the four grooves running the length of the rod. This is the key
to the AngleMag. To position the guide for accurate saw cuts going
the other way, you just rotate the rod and lock it in the opposite
groove. To switch from cutting the tails to the pins, or vice versa,
just rotate and lock the rod 90 degrees. Consult the manual that
comes with the AngleMag for more details on the operation.
|
|
The
Tools Required
|
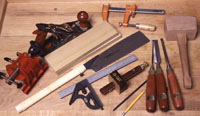 |
The
tools required for use with the AngleMag are pretty basic - the same
you would use for most joinery and cutting dovetails. Our photos feature
the following tools: The Clifton No. 4 bench plane, which will be
used at the end to trim the joint smooth (in a pinch a sander could
be used). A good square and a combination gauge are used for accurate
layout. The bar clamps in the top of the photo represent the clamps
you will use when you glue the joint up - any type of clamp will do
as long as it is long enough. The Ashley Iles chisels shown are part
of a very popular and highly rated set we carry and really represent
the classic English bench chisel at their best. The chisels are used
for removing the waste between the pins and tails, and possible trimming
of the joint to help the fit. We use a classic English mallet for
striking the chisels. You'll also note a pencil and layout knife,
and the two pieces of poplar we will be joining. But the most important
tools shown are the AngleMag and a large Japanese dozuki saw. |
|
Selecting
a Saw
|
| |
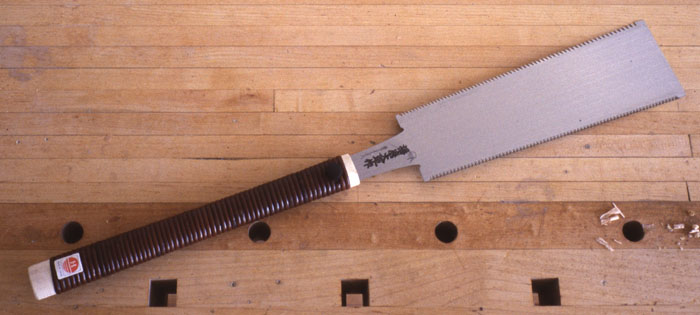
The
way the AngleMag works is simple: strong magnets hold your saw against
the guide so you saw straight. Unlike a mitre box or a non-magnetic
jig, magnets give the saw no place to wander. Almost any saw can
be used - even a saw that is less than ideal for unguided joinery
- because with the guide ensuring that the saw cuts straight, only
a saw that is seriously out of whack could cause a problem. The
important thing is that the saw is either unbacked or is wide enough
so that the saw can cut deep enough in the work before the back
interferes with the magnetic guide. A "short back" dozuki saw works
fine (and that's what we will be using here), as does a big Western-style
tenon saw.
The
particular saw we are using, a"short back" dozuki shown in the photograph
with all the other tools, is pretty inexpensive, has a fairly thick
blade (.5mm), and is filed combo rip / crosscut. It cuts fairly
slowly but because the AngleMag guides the saw this isn't a problem
and the saw is great for this purpose.
|
| |
A Japanese
ryoba saw like the one at left, has teeth on both sides of the blade.
One side of the saw is filed for rip cutting and the other side is
filed crosscut. The saw isn't ideal to use with the AngleMag, because
teeth on the trailing side will damage the surface of the guide. But
since I don't own a unbacked single-edged rip saw (other than some
huge handsaws),when I next do a lot of dovetails, I might use an old
ryoba with the crosscut teeth purposely dulled so that I can use the
quick cutting rip teeth with the AngleMag. If you do mar the guide
a lot, you'll definitely appreciate that a replacement guide facing
is included with the AngleMag. |
|