


How to Set the Hoops on Japanese Chisels
Bench and mortise chisels made in the Japanese tradition are hooped at the end of the handle. This is to keep the handle from splitting when it's hit with a hammer, and allows for a more slender wood handle that is very comfortable to hold. Paring chisels, which are not meant to be hammered, are not hooped. Wood moves with the weather, so it is traditional to ship the chisel with the hoops barely fitted to the handle so that the user can properly set the hoop on the handle. The actual time it takes to set a hoop on a handle is only a few minutes, although with an entire set of chisels the task may seem daunting. Fear not! One of the best things about setting the hoops on a new set of chisels is that you get a chance to really feel the fit of the handles in your hand and become acquainted with the tool. This is also a good time to remove any maker's labels on the handle, and if you wish, to refinish the wood. For those of you who may be a little hesitant about buying a set of Japanese chisels because you have to set the hoops, don't be put off by this! Like many tools - power tools in particular - Japanese chisels need to be set up before you use them for the first time. But it's well worth the effort. If the simple steps below don't convince you, see the note at the end of this page.
Click here for the entire Japanese Chisel Department
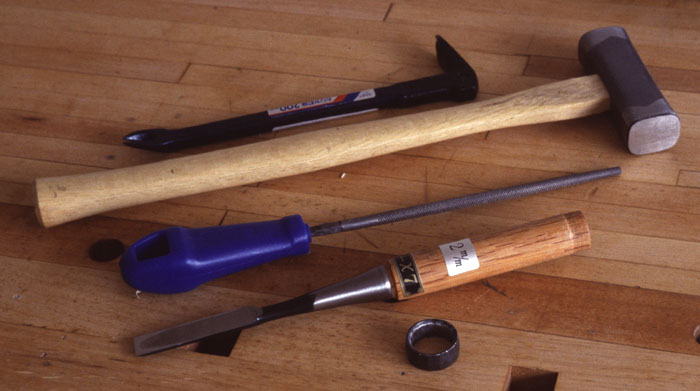
The tools you need to set the hoops are very simple: The chisel and its hoop, a rat-tail file, a Japanese steel hammer, and (optional) a cat's paw. I also used another chisel for trimming the handle and a spring clamp for holding the chisel in a glass of water (not shown).
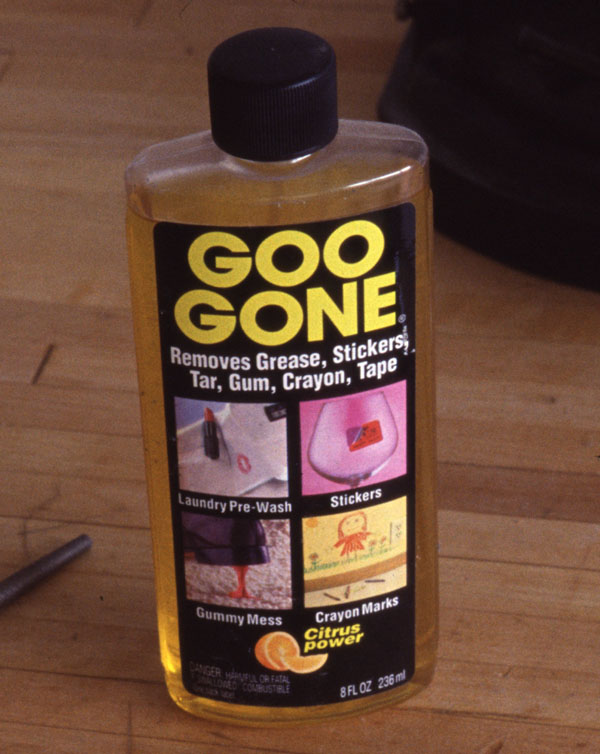
Note: The best way of removing maker's labels is with a product called "Goo-Gone." It seems to be readily available in houseware and hardware stores and it is truly is a miracle product. It removes the sticky label gunk (labels, tape residue, mysterious sticky things) and doesn't damage the finish. One bottle will last a lifetime and we use it every time we buy something with a label on it.
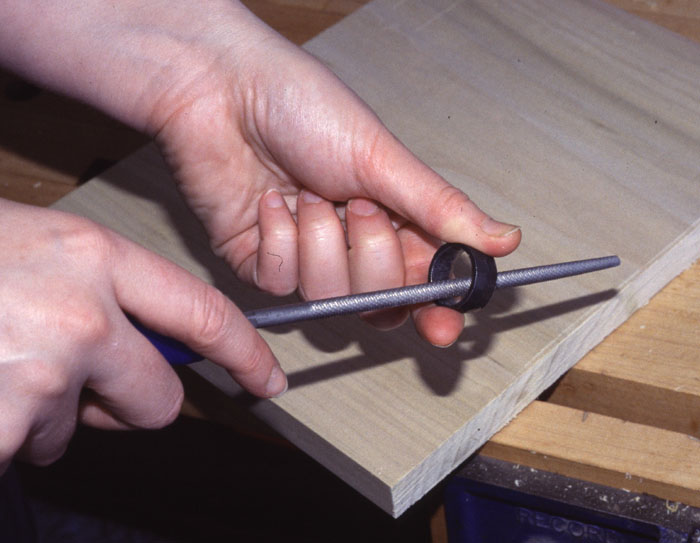
Using a rat-tail file, file any roughness or ridges off the inside of the hoop. This step is very important.
Fit the hoop to the handle. It should easily seat about a 1 /32" - 1/16" below the top of the handle. Note that the bevel edge on the inside of the hoop should be facing downwards, towards the cutting edge. If it isn't, either file the hoop a little wider or slightly trim the handle all around with a knife. If, when the hoop was originally forced on the handle by the maker, a ridge in the wood was formed limiting how low the hoop will go, you may want to carefully trim down this ridge a little with a knife. Just slightly, to even it out a little.

Using a steel Japanese hammer, hammer the handle all around the area where the hoop will go. The purpose is to compress the fibers of the handle a small amount so the hoop slides down further. Use discretion - the handle will compress very slightly but not enough for you to see it easily.
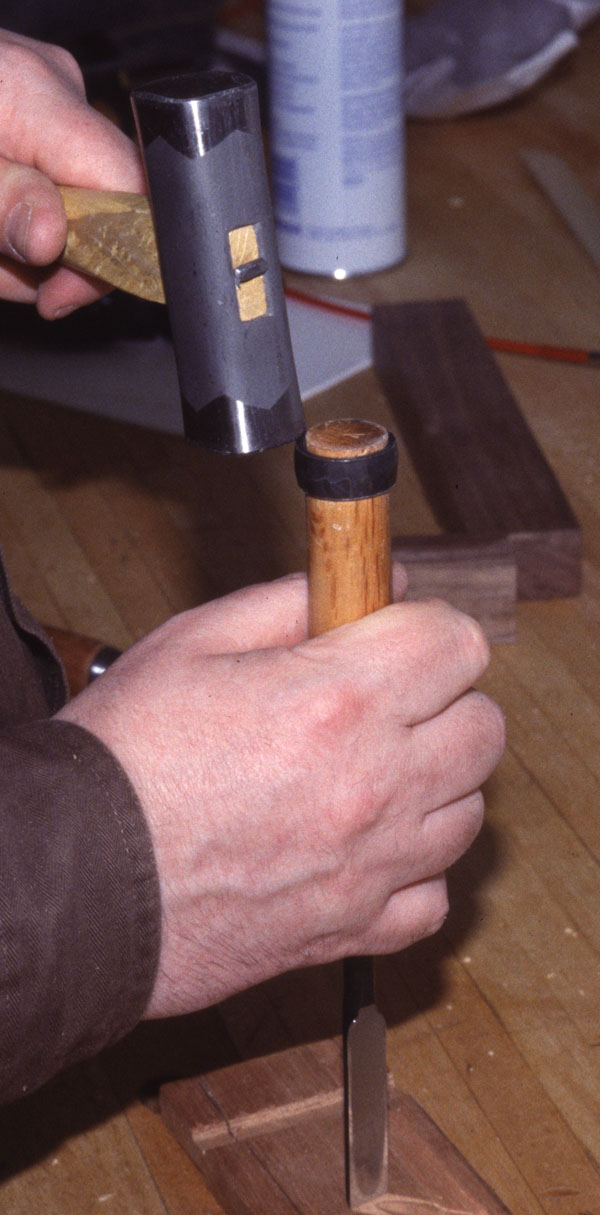
5. With the hoop seating correctly, seat the hoop permanently by gently hammering the hoop down directly or using a cat's paw. Do not hold the handle in a vise, since hammering a clamped handle will loosen the blade. With wider chisels hammer the hoop with the blade resting cross-grain on a scrap of wood. For narrower chisels - such at the 1.5 and 3mm do NOT rest the blade on a scrap of wood as the hammering, if too strong, could crack the chisel. Either hold the chisel in your hand as described in step 7 or drill a hole in some scrap and support the chisel under the bolster.
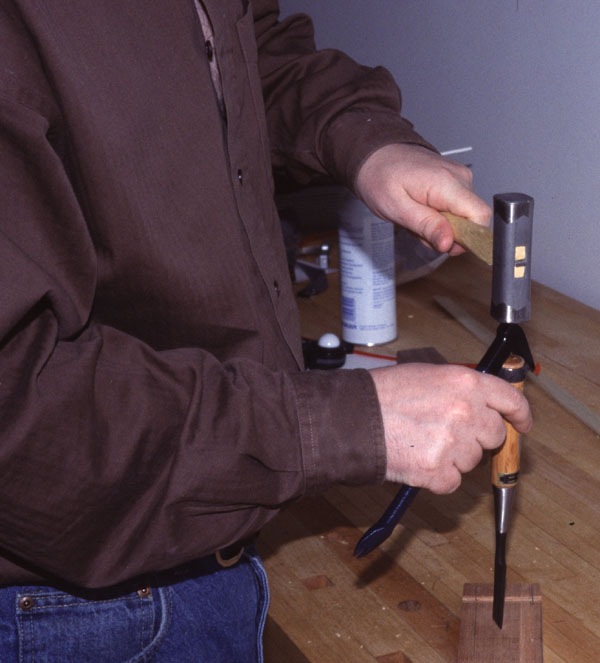
5A: You can also seat the hoop using a cat's paw to hammer down the hoop evenly. It's a little faster then doing it just with a hammer and worth the investment for a large set of chisels.
6.
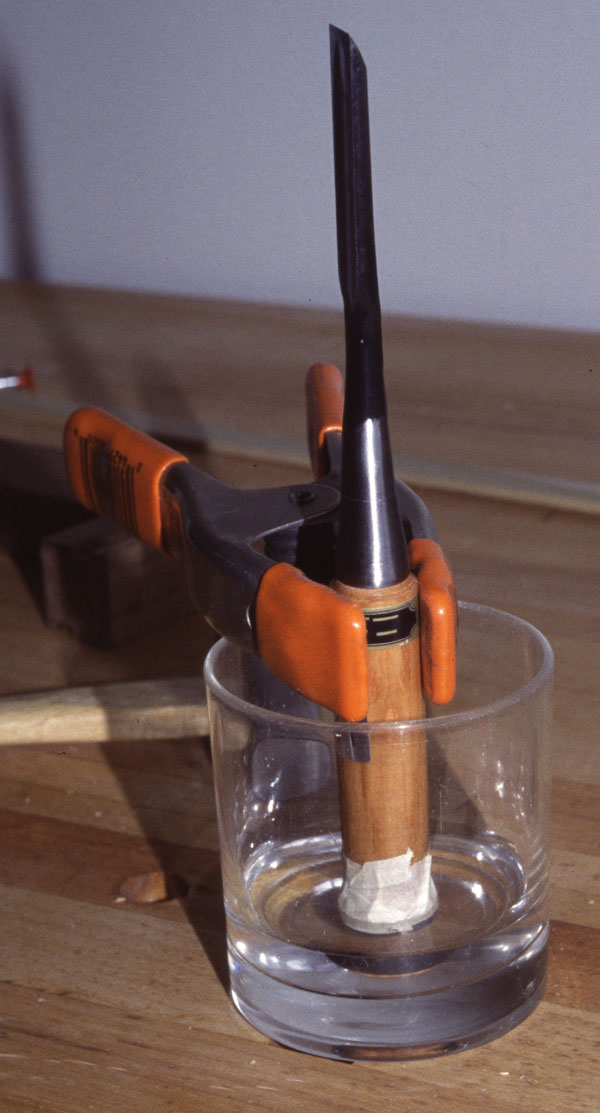
Soak the top quarter inch of the handle in a partially filled glass of water
(about 20 minutes seems right for oak, denser woods such as boxwood should soak longer around 30-40 minutes). This is to make the compressed wood of the
handle swell back to its original size and to soften the wood for step 7.
Be careful not to get the rest of the handle wet, since this will damage
the finish on the handles. On this chisel I put some masking tape on the
hoop and part of the handle to make sure I didn't get the handle wet. I
used a spring clamp to keep the chisel supported vertically in the water.
On my set of chisels, I ended up deciding to refinish the handles completely.
I sanded off the entire handle finish before setting the hoops and applied
a Danish oil finish after I was all done.
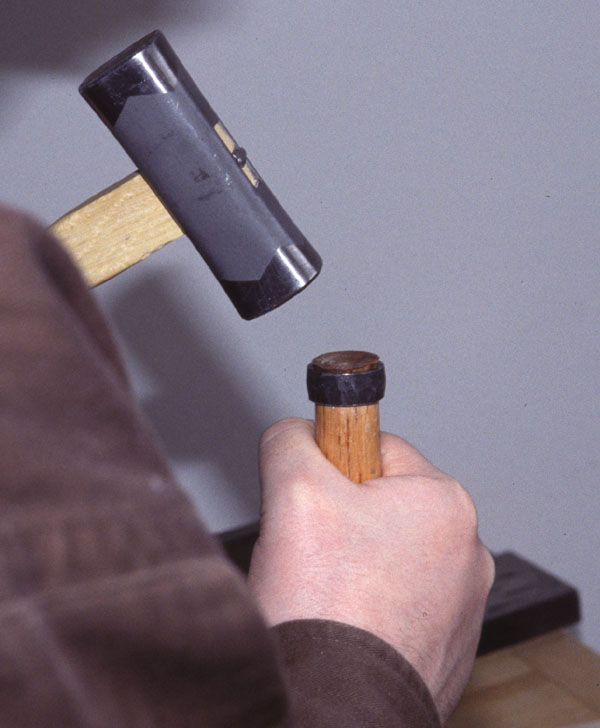
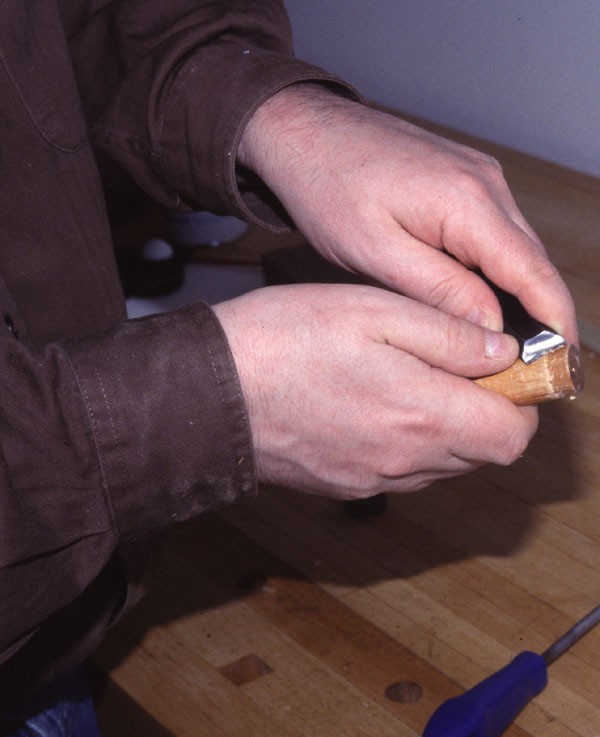
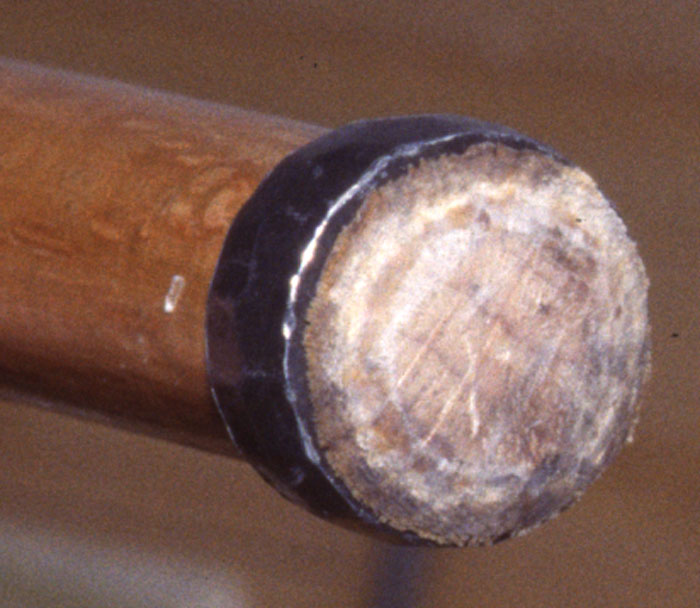
7. Holding the chisel with one hand, "mushroom" the top of the chisel with a steel hammer by hitting the top of the handle all around the edge. You can't see it in the picture, but I'm holding the chisel in one hand and bracing my hand against my chest. In this case the edge of the chisel is unsupported (as opposed to when I was forcing down the hoop). I'm striking glancing blows all around the edge of the handle, and slowly the end grain of the handle mushrooms over. You can see in the next two pictures what the handle looks like when I'm all done.

Total elapsed time: about five minutes including the filing of the hoop (the most annoying part of the process) and 20 minutes or so for soaking.
8. Dry the chisel and oil the blade to prevent rust.
9. Let the handle dry completely.
10. If you plan to refinish the chisel, apply your favorite finish after the handle is completly dry.
Conclusion:
While setting the hoops may seem like a lot of work, you only need to do
it once per chisel per lifetime. Once you get in practice, you will set
the hoops with very little effort. In time and with use and changes of weather
the hoops may loosen up again. That's okay. The mushrooming is permanent
and will prevent the hoops from coming off.
Note: We have begun to import certain styles of chisels with their hoops
already mushroomed by machine. This is a brand new product and we are one
of the first companies to import these chisels to the United States. The
look is different, and there is an added cost, but it may be right for you
if you really want a Japanese style chisel but do not want to get involved
with setting your own hoops.
Click here for the entire Japanese Chisel Department
|
Hours: M-F 9:00-5:00, closed Sat,Sun Our Guarantee & Return Policy Shipping and Sales Tax Info Privacy Policy Holiday Calendar |
|
Contact Us:
Email: support@toolsforworkingwood.com Phone: 800-426-4613 or 718-499-5877 Visit Us in Brooklyn: Directions to Our Showroom © 1999-2019 toolsforworkingwood.com Powered by 01 Inc. Coded entirely in NYC |