Chris Pye is one of the best teachers I have ever had the pleasure of learning from. Certainly a decent part of his success with students is due to his insistence on getting the basics right. If you study with him in person or on-line through his most excellent website one of the first things he talks about is how to hold a carving tool effectively. For me, following his advice made my carving much easier. I have both more control and more power at the same time. Also by learning that there are two basic grips and using the right grip for the right operation made it possible for me to control my tools and feel a lot less hesitant about carving. So I feel really great being able to share this basic tutorial on carving, written by Chris Pye. Chris's website works by paid subscription. It is worth every dime. You can subscribe directly on his site (we don't get a dime if you go direct) - He has hundreds of videos on all facets of carving.
- Have a Wonderful Thanksgiving to you and yours - from everyone at TFWW.
Get a Grip - by Chris Pye
Golfers know it. Baseball players know it. Even those who putt balls into little holes know it: The grip on the bat or club makes all the difference to how successfully you play the game.
It's also true of woodcarving, which is all about making the tools work for you. Once you have a properly sharpened, keen gouge in your hand, how you hold and manipulate the thing is crucial not just to the success of the carving but to the very joy of carving itself.
We carvers need grips that are safe, efficient, versatile, controlled and strong. I see students straining their wrists or elbows; limiting the flow of cutting edge through the wood; or making a lot more work about carving than is really necessary.
Putting aside what you shouldn't do, here are 2 exemplary ways of holding and manipulating full-sized carving tools. I use variations of these grips all the time. They will feel unfamiliar to begin with; your muscles and hand-eye co-ordination need to develop. But if you start with good practice and keep going, one day you'll find yourself swapping between these two hand positions continuously and without thinking - and your carving will have improved enormously.
Ground rules for both these carving grips:
These are 2-handed grips: one hand on the handle, the other on some part of the blade. Both hands work together.
The "blade hand" must rest in some way on your wood or bench adding so much extra control.
Keep your elbows in and move your body behind the tool.
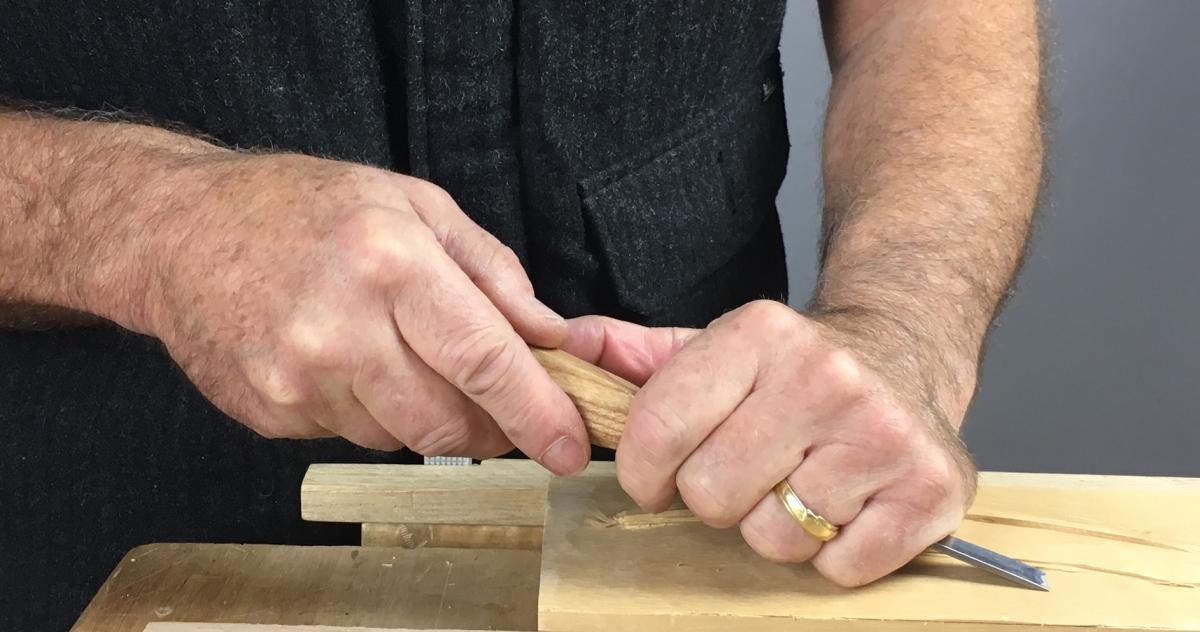
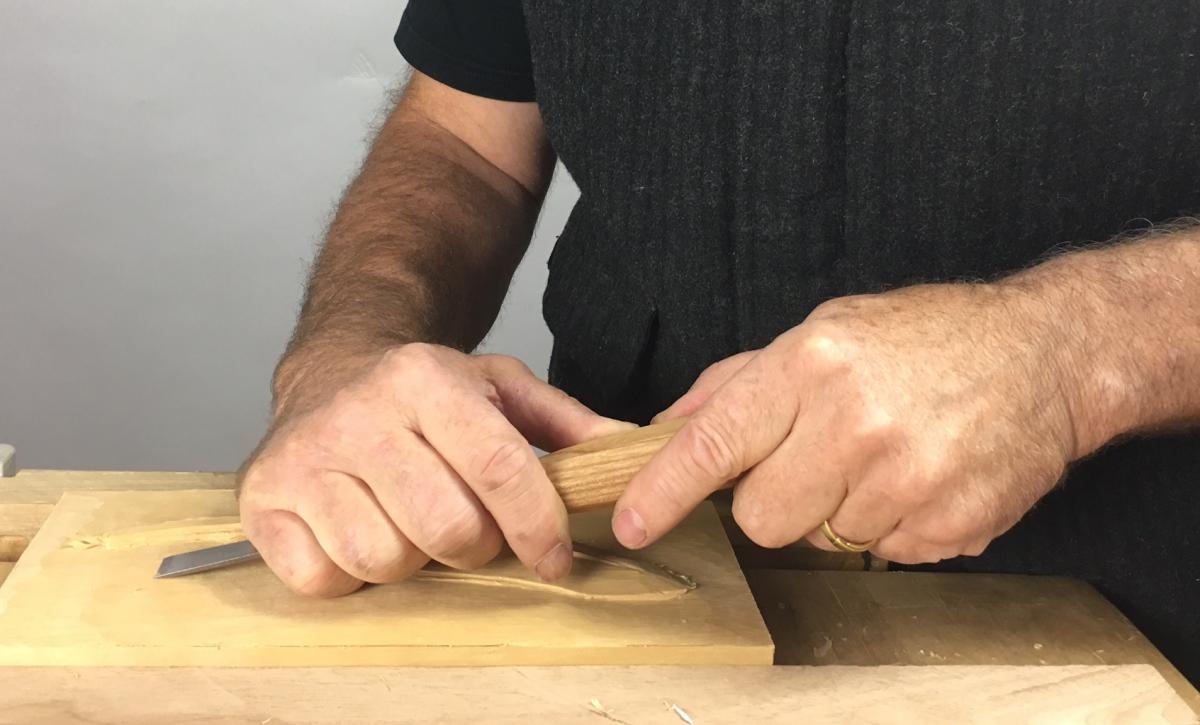
The "Low Angle Grip"
Use this grip when the tool is cutting at a low angle to the wood, perhaps when running a groove, or cleaning up a surface.
1. Take a firm grip of the blade with one hand, so the little finger curls over about an inch or so behind the cutting edge. You should be able to see the back of the hand.
2. Depending on the width of your hand and the length of the tool, your thumb will wrap across a portion of the handle. Increase the control of this hand has over the tool by extending your thumb onto the handle.
3. Rest the heel of this blade hand on your wood. Sometimes I rest the whole of my forearm on the wood as well.
4. With the other hand, grip the handle comfortably. This hand is going to push.
Here's the secret: While you are pushing the tool with one hand, resist the forward movement with the other.
Thus there is a tension between your hands, a balancing of forces: pushing and resisting. It is the difference that allows the tool to cut in a controlled manner, starting and stopping precisely as you choose.
It's great if you learn to swap hands with this grip so you can work easily between left and right in either direction.
Reversing for the opposite direction
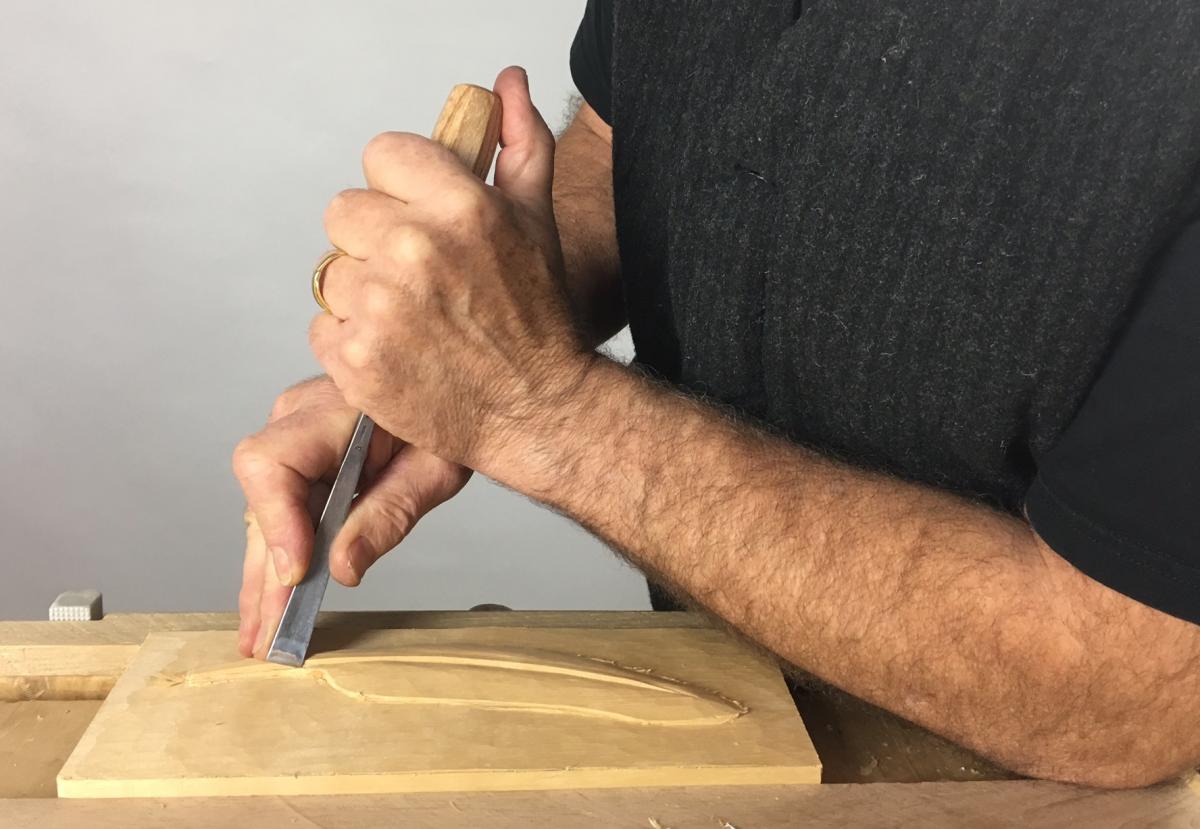
The "High Angle" Grip
This is an extremely important grip to master, combining control with finesse and, when you can involve your shoulder, a fair degree of power. Use it for setting in and detail work - any time the tool is presented more perpendicular to the wood.
1. Place a gouge upright on the wood surface.
2. Hold the handle somewhat like a dagger in your non-dominant hand.
3. Place the tip of the middle finger of your dominant hand onto the wood and tucked tight up behind the bevel of the tool, thus bridging tool and wood. The middle finger tip controls the blade in the same way as the heel of your hand did in the low angle grip.
4. Bring up the ring and little finger behind the middle finger to support it. t
5. You should have a finger and thumb of your dominant hand remaining. Use these to grip the blade.
6. At times, you can bring the heel of your hand down onto the wood surface too.
You needn't swap hands with this grip and, to get the most from this way of holding takes time: you will need to develop the gripping muscle between your index finger and thumb.
The High Angle Grip
Those are the two basic grips: you will develop these ways of holding as you become familiar with them, adapting to circumstances. Eventually you will not notice yourself swapping between the two in a fluid manner and find yourself carving more comfortably and successfully.
If you have a subscription to my website, or wish to subscribe, here is the link to the "Grip Series", https://www.woodcarvingworkshops.tv/videos/techniques/grip-series-x10 under the Techniques section of my website which, along with lots of other stuff, has video demonstrations of these grips.


 Joel's Blog
 Built-It Blog
 Video Roundup
 Classes & Events
 Work Magazine