|
|
04/06/2016 |
 In a previous blog I mentioned that we plan to start offering various classes in our new space on 26th street. AsI was preparing notes on sharpening for a class I realized that with over 300 million people in this country, not to mention the several billion on the planet, even if only one million people sign up for the class at maybe 10 people a class that's one hundred thousand classes and at 2 classes a day and teaching seven days a week that's over 300 years worth of classes. Not to mention people signing up again for a refresher. So I decided making that my notes public would be a good idea. In a previous blog I mentioned that we plan to start offering various classes in our new space on 26th street. AsI was preparing notes on sharpening for a class I realized that with over 300 million people in this country, not to mention the several billion on the planet, even if only one million people sign up for the class at maybe 10 people a class that's one hundred thousand classes and at 2 classes a day and teaching seven days a week that's over 300 years worth of classes. Not to mention people signing up again for a refresher. So I decided making that my notes public would be a good idea.
In my own case I pursued sharpening because in my early years of woodworking I could not get my tools to work as easily as Roy Underhill did on his TV show. A lot of people, well meaning people, people who are trying to work wood, have trouble with getting their tools to work because the tools are not sharp and I think the reasons they cannot get their tools sharp fall into the following categories.
Note: at the bottom of this entry is a list of links to lots of the sharpening topics I have written about over the years.
You don't know what a sharp tool really is and how well it can work
If you have never seen a sharp tool slice effortlessly through wood it's hard to figure out how far you need to go. It's also instructive to have practical experience on how different applications have different requirements of "sharp". For example my bench chisels are sharp. The edges are robust and can take a mallet. But when I started carving I had a go with one of Chris Pye's tools and in one second I got a visceral lesson on the requirements of sharpening for carving and how much further I needed to go.
Solution:
Find someone whose ability you respect and ask to borrow a chisel for a few minutes. Failing that take a look at some videos. Not videos on sharpening, but videos of people who you respect actually using tools. See how their tools behave. This will be an instant lesson on how far you have come and where you need to go.
Your Technique Sucks
In sharpening the lessons are all about "easy" and having the right stones and gadgets. The biggest issue I see in sharpening is that people have inconsistent technique (freehand or with a jig). With inefficient technique most of the effort on flattening a back or trying to raise a wire edge is wasted. The only thing that counts is the effort made at the cutting edge. Spending hours flattening a part of a chisel an inch from the cutting edge does nothing and can easily result in rounding the back. If, when you sharpen, you are mostly honing the middle of the bevel, not the cutting edge, you are achieving nothing. And for those constantly raising the chisel on the stone to ensure that you are honing at the cutting edge, raising the angle reduces the penetrating ability of a chisel and makes the tool harder to use.
Solution:
Learn one consistent technique and practice it. Freehand or honing guide, it doesn't matter. Being consistent does matter, so that each time you sharpen you are working the same edge, not reestablishing some new sort of bevel.
You Need A Grinder
Really! You do! A grinder will easily repair edges that have chipped or bellied bevels that are hard to sharpen and easily reestablish cutting angles. We stock Baldor grinders which are awesome and at the top of price curve. You can also get a very inexpensive imported grinder, just put good wheels on it, and keep the wheels dressed. Until I upgraded to a Baldor I had an inexpensive noisy grinder for years and it worked fine. Think of it this way: You are spending thousands on tools and wood, why would you not also invest in making sure the tools are working correctly. I like a hollow grind - it makes sharpening easier so I don't really have a use for any of the flat grinding systems out there. I think the Tormak is cool, but way too slow for what it is.
Solution:
Get a grinder. Get good wheels on it. Keep them dressed. Learn to grind.
Your Stones Aren't Flat Enough
I get tired of reading contrarians who tell us that in the old days nobody flattened their stones and you routinely see dished stones at flea markets. In theory, especially for knife sharpening, if a stone is only used by one person, who sharpens consistently a dish doesn't matter because blade and stone will conform. This is sort of true. For woodworking tools it's a falsehood. First of all even as far back as 1839, in The Joiner and Cabinetmaker, the text tells us about keeping stones flat and that joiners would pay a fine if they neglected flattening the shop stones after use. But the real reason for keeping flat stones is consistency. It is far, far easier to sharpen something if you know that when you rub a bevel on a stone it contracts the full width of the iron. And when you work a back your stone is actually contracting the back of the blade, evenly, not wearing it to a curve. If you use multiple stones (of different grits as we usually do) you want the same behavior from the stone as you go from grit to grit. Otherwise you will get weird results and sometimes screw up your blade geometry.
Solution:
If you use waterstones flatten your stones regularly. If you use any other stones make sure they are flat. You can use either a abrasive flattening stone, a diamond flattening stone, or wet or dry sandpaper on glass. All work great.
You Don't Finish With A Fine Enough Abrasive
You can cut wood with any blade sharpened at a few hundred grit and above. It's really a matter of ease of cutting and control. Stopping at a 1200 grit diamond stone, a 4000 grit water stone, or a soft Arkansas stone just doesn't give me an edge I can feel in control of, and for carving softwood - forget it. I was told by Toshio Odate, who related a story told to him by a master Japanese planemaker, that typically people don't spend enough time on their finishing stones. You know how it is. You've gone this far and you want to be done. But water stones get finer as you work them. As an experiment I worked a finishing stone on a plane iron far longer than I thought was necessary. It's true. The edge was better.
Solution:
If you use water stones or diamond stones finish up with an 8000 grit water stone or better. If you use lapping film 1 micron or finer works great. Modern Arkansas stones are cut with diamond saws and start out a little rough. They do work in to glass smooth. Follow them with a plain leather strop.
Your Abrasives Can't handle the Steel Alloy.
Just about any stone technology can handle regular old fashioned carbon steel - usually O1 alloy. But these days we love A2 and D2, and other much tougher alloys that bounce off of lots of sharpening media. Sure you can sharpen D2 on an oilstone but it will take ages and there is an excellent chance you aren't getting nearly the best edge you can. We have also found issues on A2 and D2 with some harder water stones. The A2 steel sharpens a bit on these water stones but the stone aren't friable enough so the abrasive dulls and stops working before the abrasive is released from the stone and new sharp abrasive is exposed. I won't go into brands much but one thing I really like about our Norton Water stones is that they work great on weird alloys. Naniwa Chosera stones (which we used to carry) also work really well but Naniwa Superstones - which are hard - suck on A2 and D2. It works but it way too slow.
Solution:
If you are using non-carbon steel tools a lot make sure your stones are up to the task. If not, hollow grinding the tool saves oodles of time and makes getting a sharp edge much easier. Also think about switching to diamond stones. But use an 8K water stone for finishing. The extra,extra fine DMT stone which is nominally 8K doesn't have slurry and as a result leaves a coarser edge than a regular 8K water stone (which wears finer as you sharpen a tool) .
Your Final Sharpening Angle Is Too High
The typical recommendation for bench chisels is about 25° and maybe a 5° secondary bevel. With modern alloys sharpening at lower angles doesn't work in a lot of cases as the steel crumbles. If you are constantly raising the angle of the bevel to guarantee contact with the cutting edge when sharpening your final angle might be even higher. I won't even get into back bevels and tricks. Higher angles mean more force is required for the tool to penetrate the wood. More force means less control. Paring chisels were traditionally sharpened at a very fragile 20° with a small micro-bevel. The edge was fragile but the control you get is wonderfully precise.
Solution:
Take a look at your sharpening angles and if the steel permits it try lowering the angle. Remember to include all micro, secondary, and back bevels in your calculation.
Bonus Extra Reason:
You have no idea what I am talking about. There are terms and topics I am writing about here that you might not be familiar with. This isn't your fault. It's easy for me and many writers on sharpening to get caught in minutia. But the main thrust here is that you need to learn how to sharpen. You can learn from on-line resources, videos, a class, or any mentor. But without finding a way of keeping your tools sharp - or more properly sharp enough - you will find working with hand tools an exercise in frustration. Frustration that can be easily avoided.
Solution:
Do your homework. You have been this far. This isn't brain surgery. Woodworking is mostly learning some basic technique and then practicing enough to train your hands.
To get you started here are some links to sharpening lessons and essays I have been involved in over the years:
Step by step lessons on how to hone a chisel
Is This Tool Sharp?
A Better Way to Flatten Waterstones;
Feel The Burr
Flat Back? Good Idea? How Flat is Flat?
In The Belly of The Bevel - Or How To Ineffectively Sharpen Anything
The Mechanics of Stropping - Why Stropping Works
Further Thoughts On Grinding
My Article on how to Grind from June 2008 Fine Woodworking magazine;
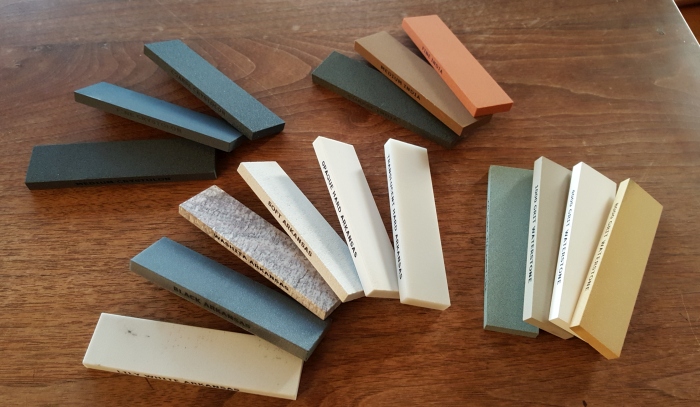
N.B. Because of the recent move my tools are still packed away and I have no idea what happened to the boxes of sample stones I used for demonstrations. So the picture at the top of this blog is the best I could do. It shows the contents from a boxed "Salesman Sample" that Norton Abrasives gave to me some years ago. It contains all their sharpening stones in a boxed set, each 1" x 4" x 1/4". The set includes some grades of Arkansas stones that aren't typically available like their "Opaque Hard Arkansas" stone and the gone but not forgotten much lamented Lilywhite Washita stone.
PS - Thanks very much for all the kind notes and comments about Maurice Fraser. It was he who first taught me how to sharpen.
|
Join the conversation |
|


 Joel's Blog
 Built-It Blog
 Video Roundup
 Classes & Events
 Work Magazine
I've read your prior comments and your article on the use of a grinder. It all makes sense, but I'm a coward.
I frequently see a number of woodworkers online and elsewhere doing final sharpening on a diamond stone or other relatively coarse medium, and I attempted doing the same.
I was wondering if the problem was just me. Thanks for confirming it's not. Even off off of the extra extra fine stone, I was finding that I needed a lot more pressure and was having more difficulty with control than what I was watching others do.
Adding 15, 5 and 1 micron papers to the end of the process, and getting a true mirror finish on even plane blades has made a huge difference. And yes, using all three of those grades helps. It makes each step take only seconds. The films, especially the mylar backed ones, seem to last forever too.
Your list is a great place for anyone trying to improve their sharpening to begin.
Sometimes we let the trees hide the forest. This cuts through the foliage to get to the hardwood.
Thanks,
Ron
Mike
2000 grit sandpaper is coarser than the stropping compound or for example an 8K waterstone. I am currently using a grinder, a fine and extra-fine diamond stone, an 8K waterstone (norton) and a plain leather strop with no compound. Technique is also important. I hollow grind everything to make my honing faster and more consistent.
If you are in NYC this Saturday come to my sharpening workshop at noon. (see event menu option)
joel
Really appreciate your comments and insights, thank you.
Michael