Last week I took an hour off work to go down the street to Brooklyn Guild, a design/build collective with a shop in Brooklyn. I met Brooklyn Guild when they came to Tools for Working Wood for hide glue. They began casually with 5 pounds, but within a week had bought nearly my weight in granulated hide. I had to know what they were working on that used so much glue, so I asked if I could visit their shop.
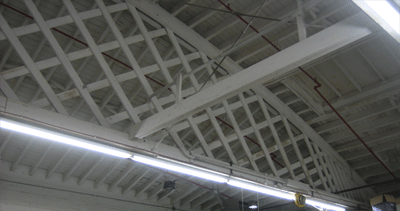
Over the course of two visits Brooklyn Guild let me snoop around their Gowanus Brooklyn facility and take photos of their technique for making pressed laminations using hide glue. On my first visit, I walked around with Mike, the shop manager, and asked a lot of questions about the process. He showed me their soak tank, hide glue vats and double boilers, pre-pressed sheets of plywood and (most awesomely) several giant presses made of solid plywood. Each press sits on a stand, placing the hulking mass of plywood at mid torso, and forming a Brutalist plywood monument to the anachronistic. A good approximation of the surroundings can be had by closing your eyes and imagining a busy sculpture garden under construction. Got it? Good, now just as you begin to zen out on that scene switch on a CNC router, chop saw, welder, and orbital sander. Ahhh... sweet, dusty, cacophonous paradise!
This project was run on a very tight deadline, and the process shown in the photos was run once a day, on each of the 7 presses, for two weeks, to get the finished pieces up and ready for their client ASAP.
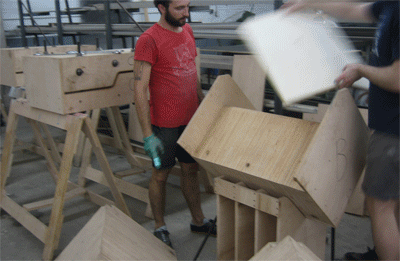
Each lamination begins as a stack of properly sized sheets of thin plywood. Each morning the sheets are soaked in water and put into the presses for pre-bending. In the afternoon the bent sheets are taken out and stickered for drying. The previous days stickerd stacks, now dry, have already been set next to the glue table. The complete stack for each of the 7 presses is kept in order so the sheets will nest correctly.
With the press prepped, two crafts-folk ladle and roller glue onto the sheets of bent ply. They work together, one ladeling while the other stacks the sheets, and then both rollering the the glue into place.
After the whole stack is gluey it is placed on the press/form. The high sides of the press help to keep the stack in line as the upper half of the press is lowered into position. The weight of the press helps because even before tightening the screws, the sheets are being squished together. The guys check the whole thing to make sure everything looks good and then quickly thread nuts onto the compresson screws and crank the whole press closed using wrenches that look large enough to dismantle the BQE. It's only been 4 minuts since they dropped the first dollop of glue onto the first sheet of ply.
The real stars here are the presses that Mike made for the job. They are humungous and well though out. Their solid construction allows them to press time and again with enormous force for an entire production run. The stands helped the guys keep up with the short open time of the hide glue. Looking at the dry laminations, the edges are surprisingly well aligned, which makes cleaning them up on a custom table saw fixture a little easier.
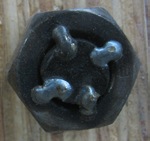
The screws that hold the presses are threaded rod. I didn't measure them but I would guess they're 3/4"-10. They go all the way through the press and end with a nut welded in place. Mike pointed out the holes for the screws and I sort of thought "Hmm cool." Then he pulled out a huge custom drill bit and it dawned on me how insane drilling a 2 foot deep hole in plywood is.
Brooklyn Guild chose hide glue as an alternative way to create flowing laminations quickly, and without using toxic chemicals. In a busy shop you might be wearing a respirator while mixing up a batch of epoxy, but the guy adjusting the router table isn't. Hide glue is low dust and non toxic, it has a short open time but by coordinating the gluing process like the guys here did, it's possible to use hide glue for very large pieces.
What I like about this project at Brooklyn Guild is that it's smart, cool and a little anachronistic, especially since the forms were cut on a cnc router. Watching the guys expertly work in tandem to move from flat plywood blanks to finished laminations reminded me a LOT of Roubo. I tried to capture the bizarre perspective of the Roubo Plates in the photos by changing my camera angle, and preferencing abstract scenes, and architecture. The result is unclear...but until Chris Schwarz finishes adding the animated .gif's to the Lost Art Press' Roubo translation so it can be released, I think this is as close as I have come to reading in French.
ABOUT BROOKLYN GUILD
I would like to thank Brooklyn Guild for letting me photograph in their workshop TWICE during working hours. These friendly and skilled crafts-people do more than just bend wood. The Brooklyn Guild collective does design and fabrication work in metal, foam, castings, faux chrystals, Wood, MDF, and Plastics for fashion houses, museums, retailers, and advertising. Their website is epic.
|


 Joel's Blog
 Built-It Blog
 Video Roundup
 Classes & Events
 Work Magazine
Lloyd
That said, the above gifs actually and truly document the process that Brooklyn Guild used.
I didn't get a photo of the finished pieces so the last photo is of an early test piece made in the same way (but joined and veneered) as a proof of concept.
Also their website is seriously next level- internet 3.0!