|
|
12/20/2017 |
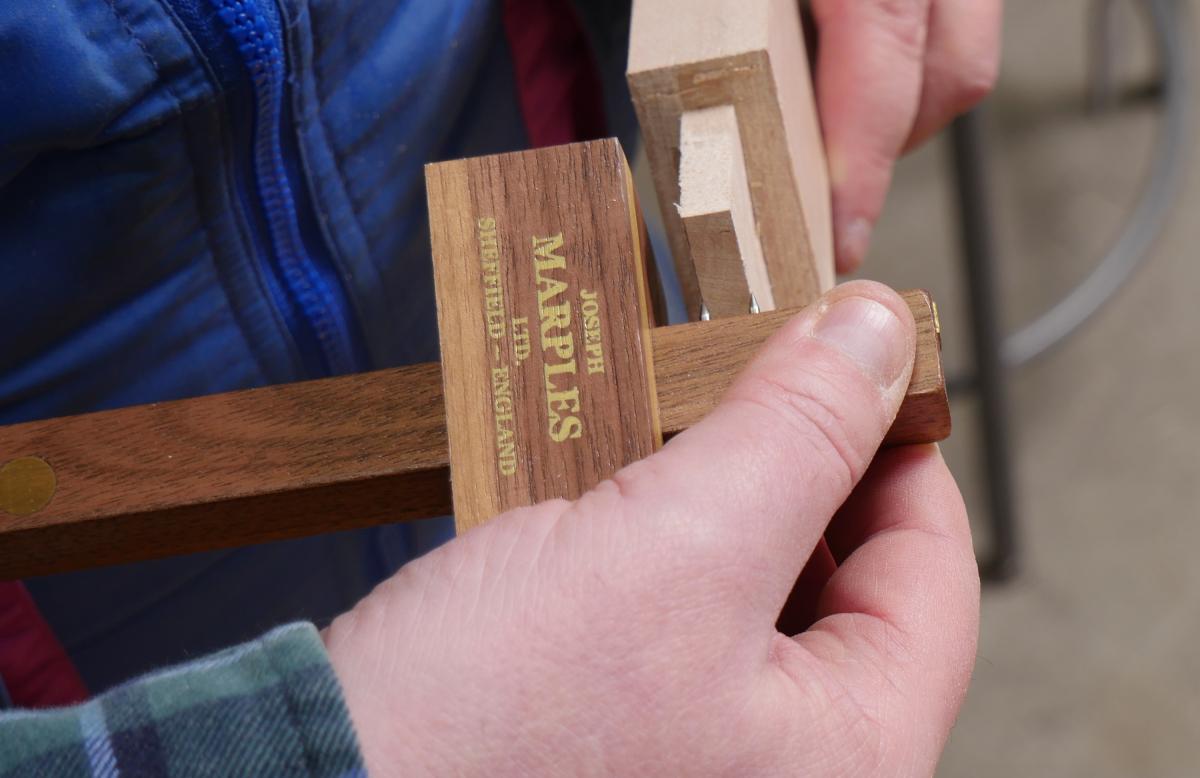
In Part One we laid out the joint and cut the tenon. Next up: I have to make the mortise. The first thing I want to do is check to see if the tenon I made is still the same width to which I set the mortise gauge. If not, I will have to adjust the mortise to the new width and possible change its offset from the edge of the stile. As it happens, [I cut the tenon pretty consistently- do you mean in general or in this instance?] and the settings I saved are still applicable. As an aside, I should mention that I own three or four combination gauges. None of them are fancy, but it's not at all unusual for me to use several at a time. For example, in this case I am making the mortise right after cutting the tenon, but if I were building something larger, I might have to size more material and work on some other part, and therefore need another gauge to transfer those measurements somewhere else. Since this gauge was taped over, I know that this measurement is safe and correct. I am ready to layout the mortise.
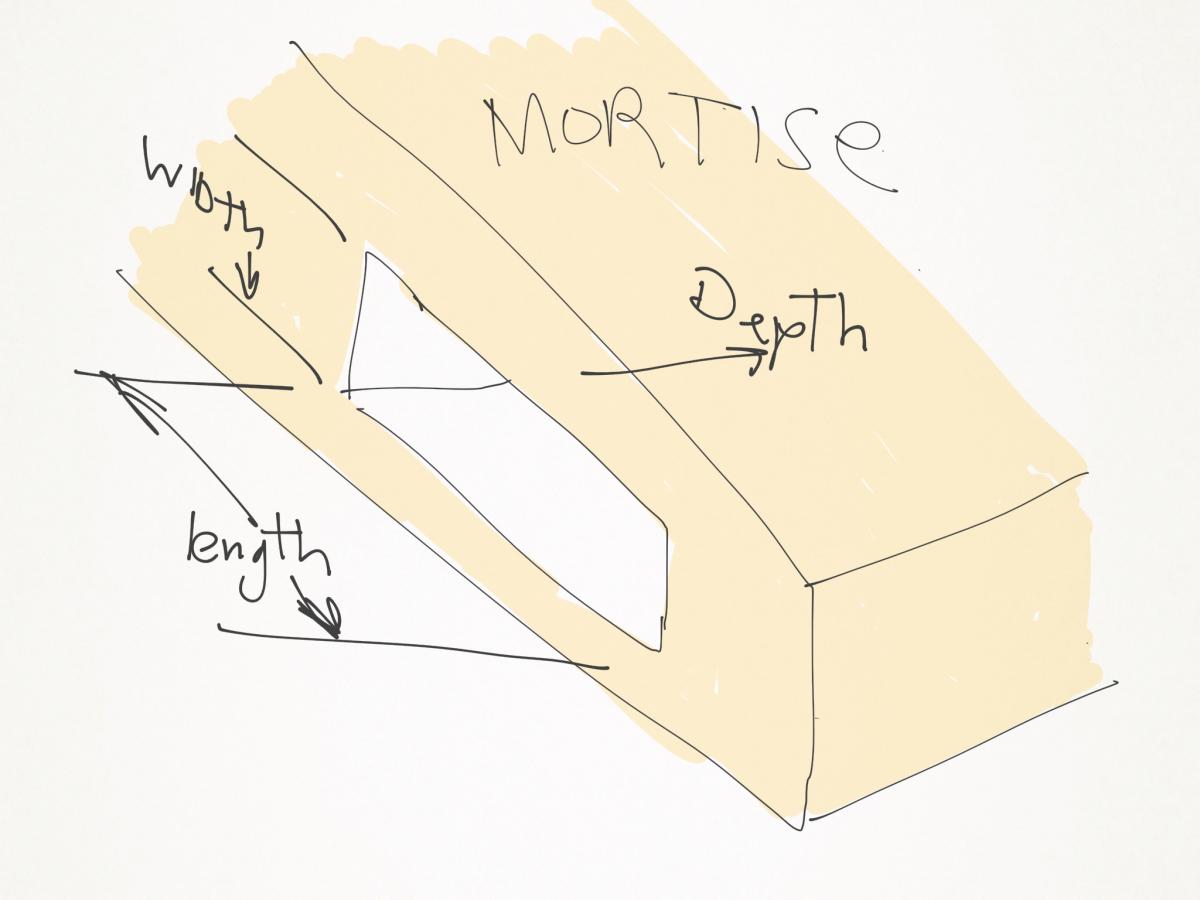 
 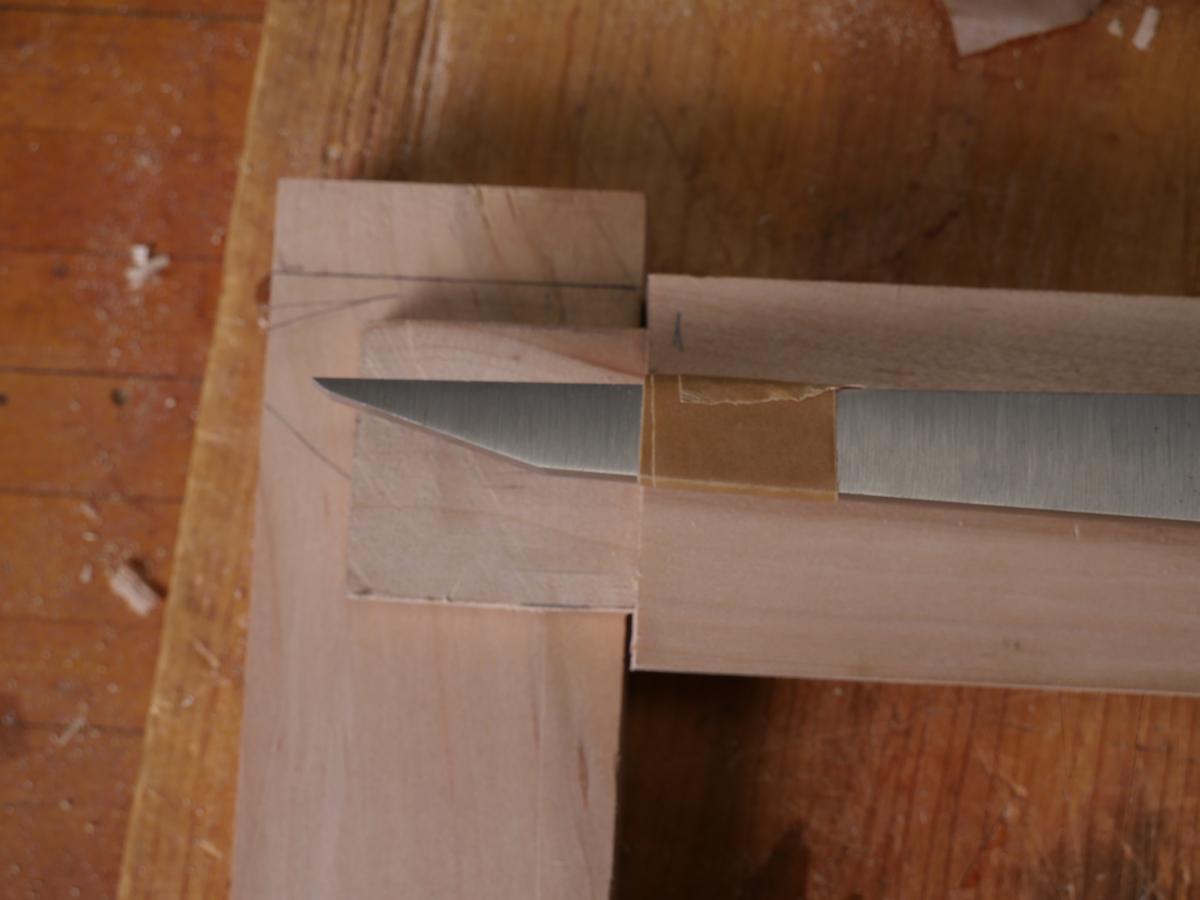
I want to make sure I have space in the bottom of the mortise for any squeeze-out of glue and also if the mortise bottom isn't perfectly flat. So I am setting the depth of my mortise to a little past the length of the tenon. I will also chamfer the edges of the tenon to make it easier to insert. To make sure I don't get carried away, I amI wrapping masking tape at the correct depth of the mortise chisel. I am using a traditional English Mortise chisel. The oval handle makes it easy to keep the chisel aligned with the joint. This style of chisel is as beefy as it comes and can take a lot of levering force.
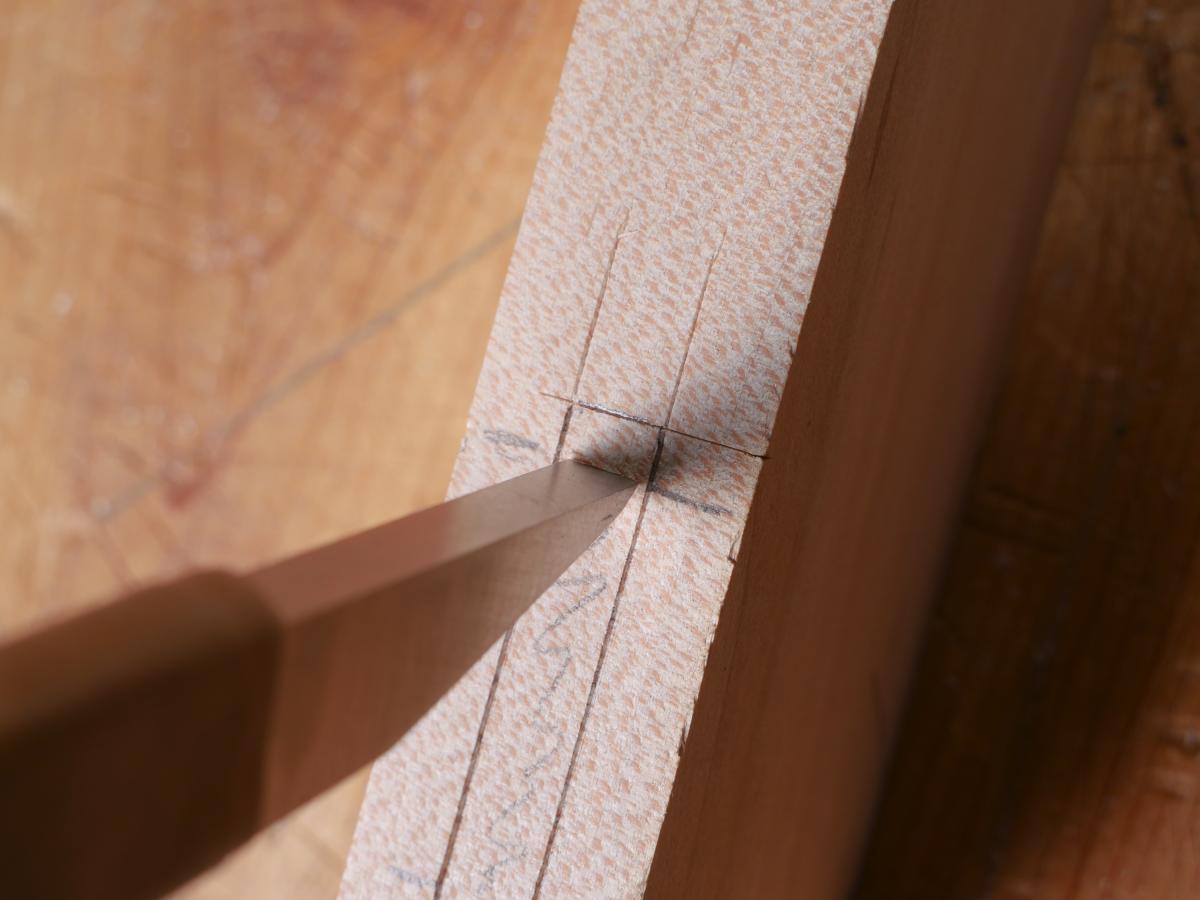
Using a mortise gauge, I lay out the exact dimensions of the width of the mortise, and using a knife and square, I knife in the ends. I always worry if there isn't much distance between the end of the mortise and the end of the stile, I could blow out the mortise in the process of levering out waste. So if possible, I try to make the stile a little longer than final dimension to add stength to the top end of the mortise. It's easy to cut the stile to an exact length later.
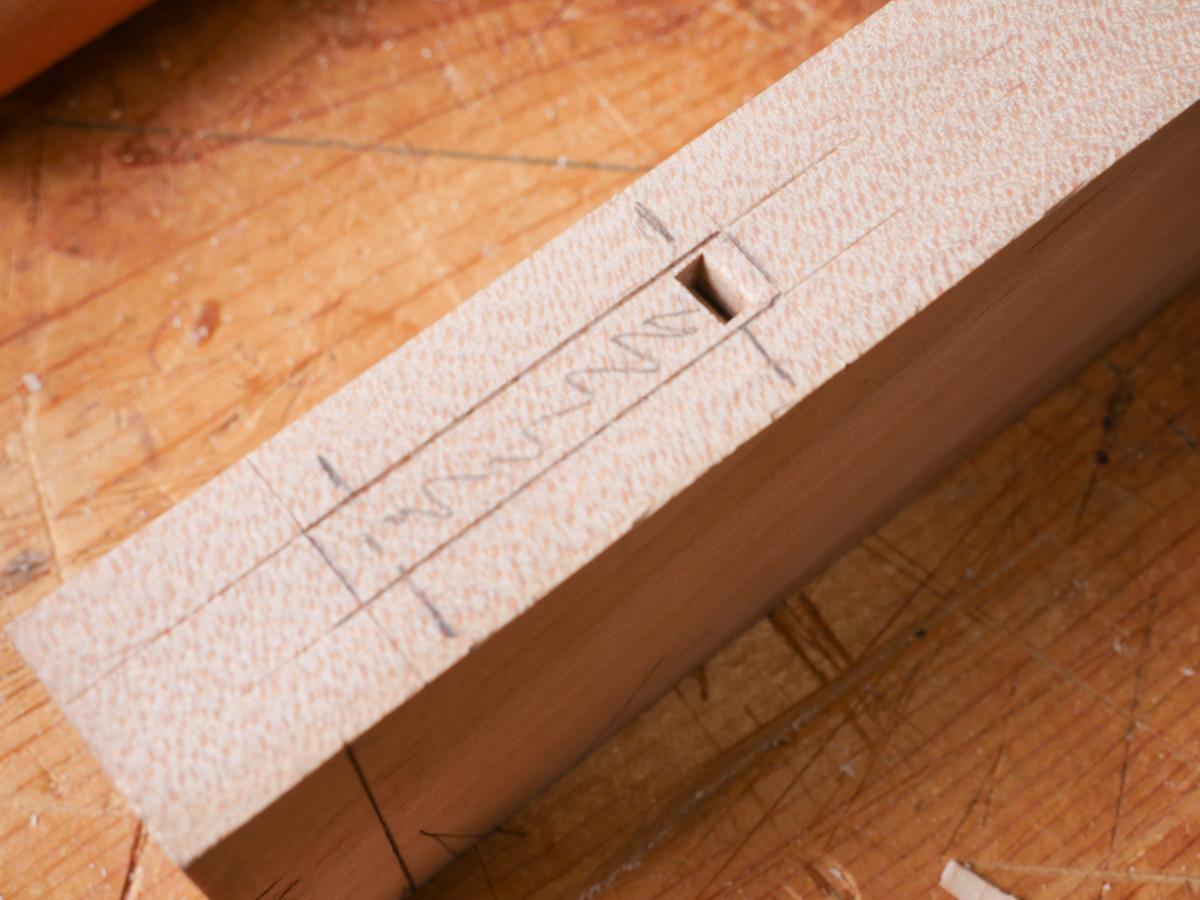
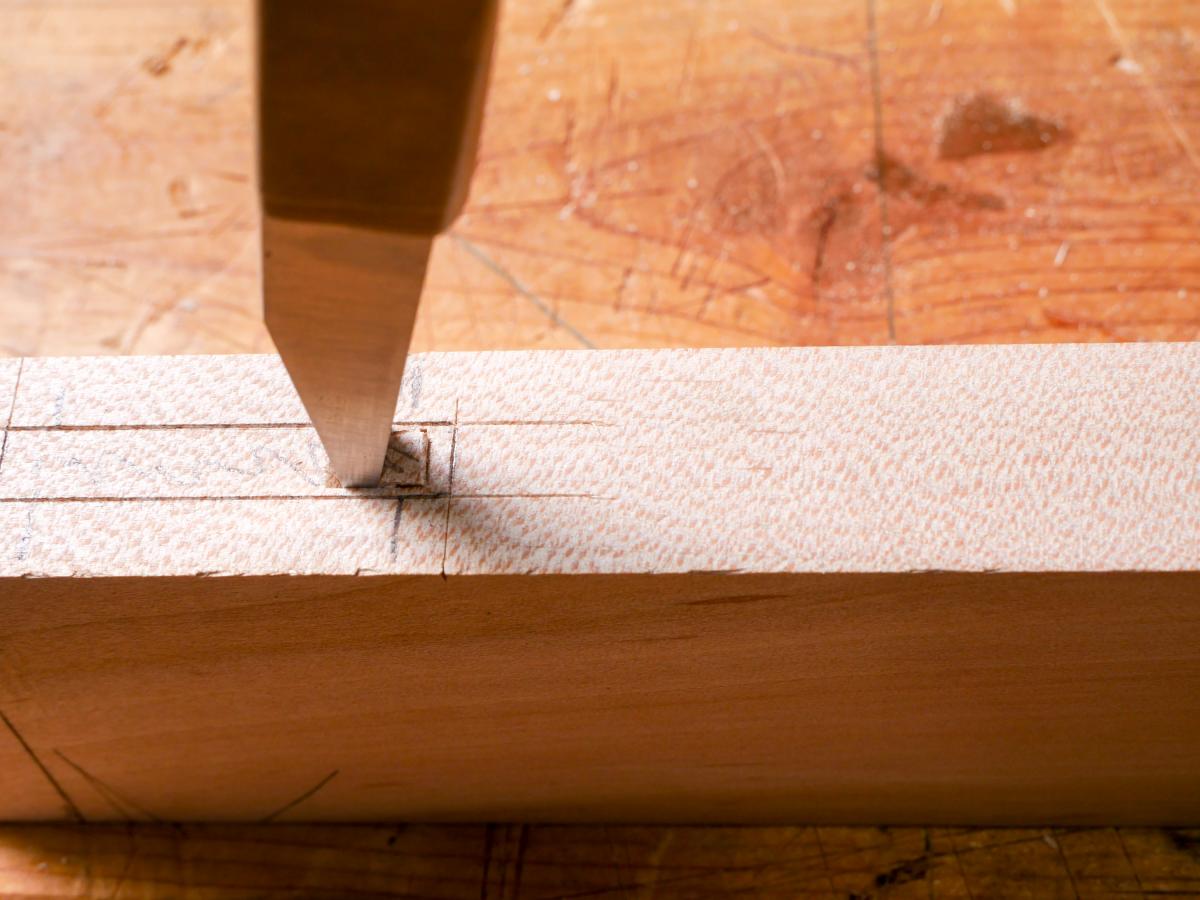
When you mortise you lever out lots of material, so to avoid crushing the ends of my mortise, I draw a pencil line about 1/8" or 3/16" in from each end. I initially chop to these pencil lines so i don't damage the final edge. My mortise is about 5/16" wide - but my mortise chisel is a little narrower (1/4"). This gives me some wiggle room so I don't worry much about damaging the sides of the mortise while chopping.
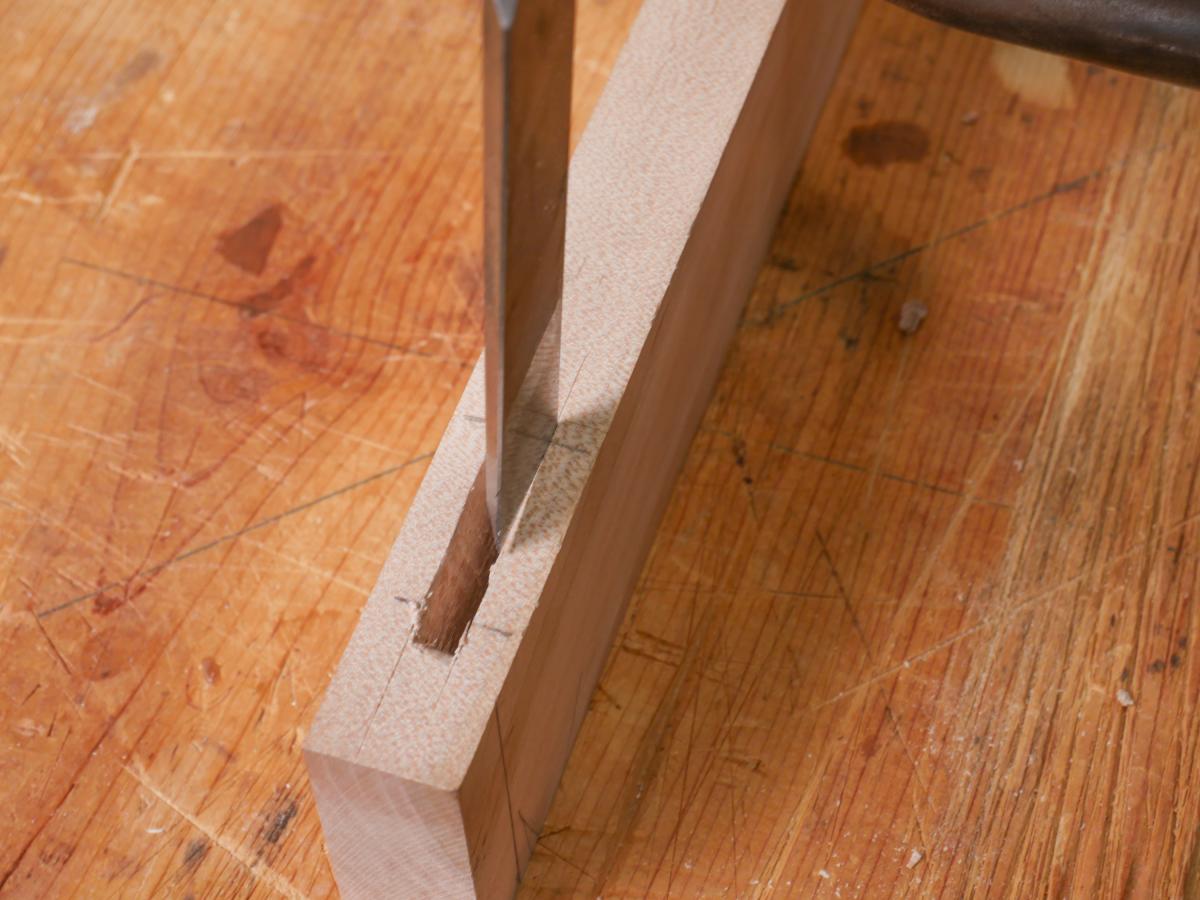
With the bevel of the mortise chisel facing me, and the chisel edge on the far penciled line, I take my first blows. I'm not trying to go too deep. Then I wiggle my chisel back and forth, put it out and move the chisel about 3/6" closer to me. I make another blow or two and then tilt the chisel away from me. As the chisel is trapazoidal in section, this loosens the chisel in the cut, and pushes back at the chip I just made between my first and second cut. Then I pull the chisel towards me, prying out and ejecting a chip of wood. I am going to repeat this all the way to the end of the mortise. As I do this, I end up going a little deeper with each stroke. By the time I have reached the end of the mortise I am about 1/2" deep. The key to doing a successful mortise in this way is making sure that you do not go far enough between cuts, or deep enough, so that when you try to lever out the waste you can't and the wood fights back. If that happens, just take a smaller bite. If you aren't able to lever out the chip and continue trying to force the chisel towards you, the tip - which is fairly thin near the cutting edge has no place to go - might snap. So pay attention.
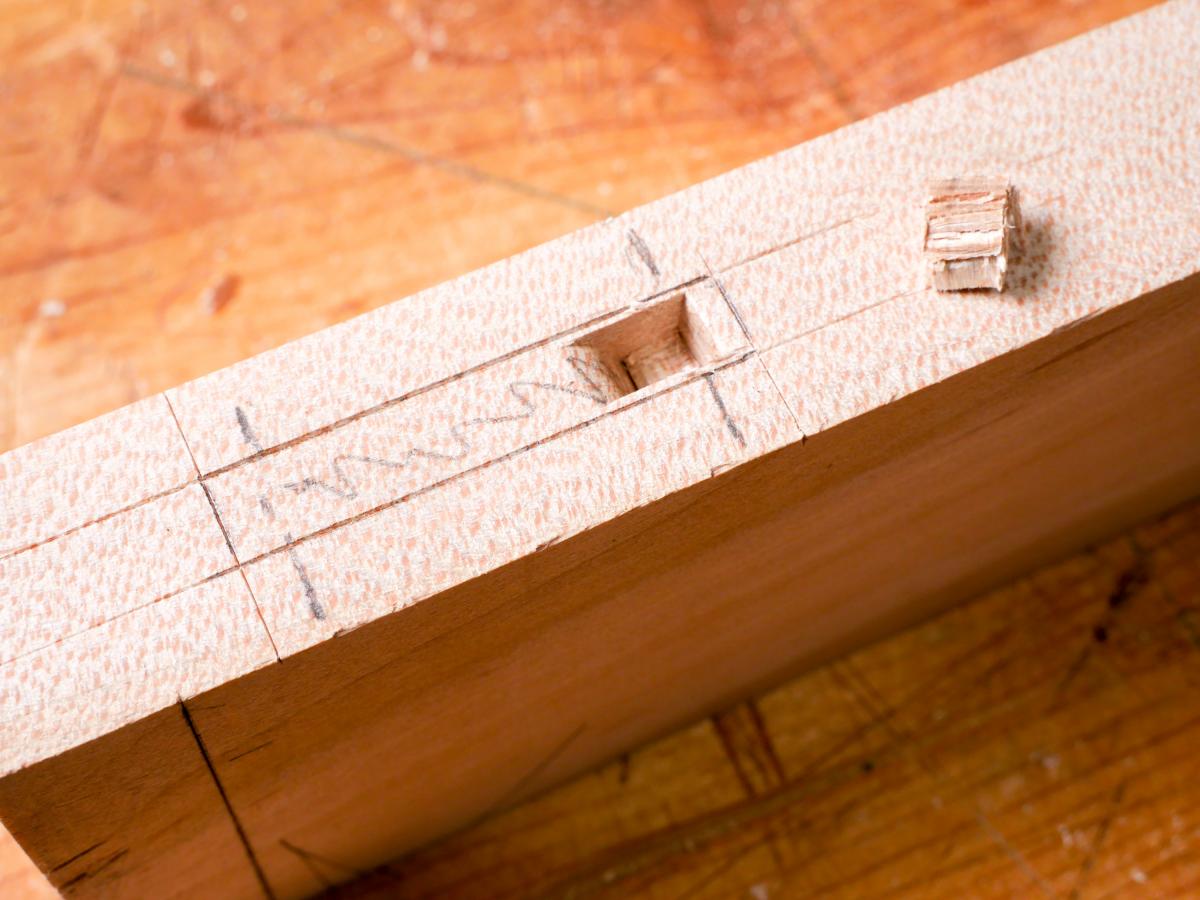
After I finish one pass along the length of the mortise, I repeat what I am doing until I get to my final depth. The deeper the mortise, the harder it is to eject chips. They do get stuck. If nothing else works to get rid of the chips, I try poking around with a narrow bench chisel to break up the stuck chips.
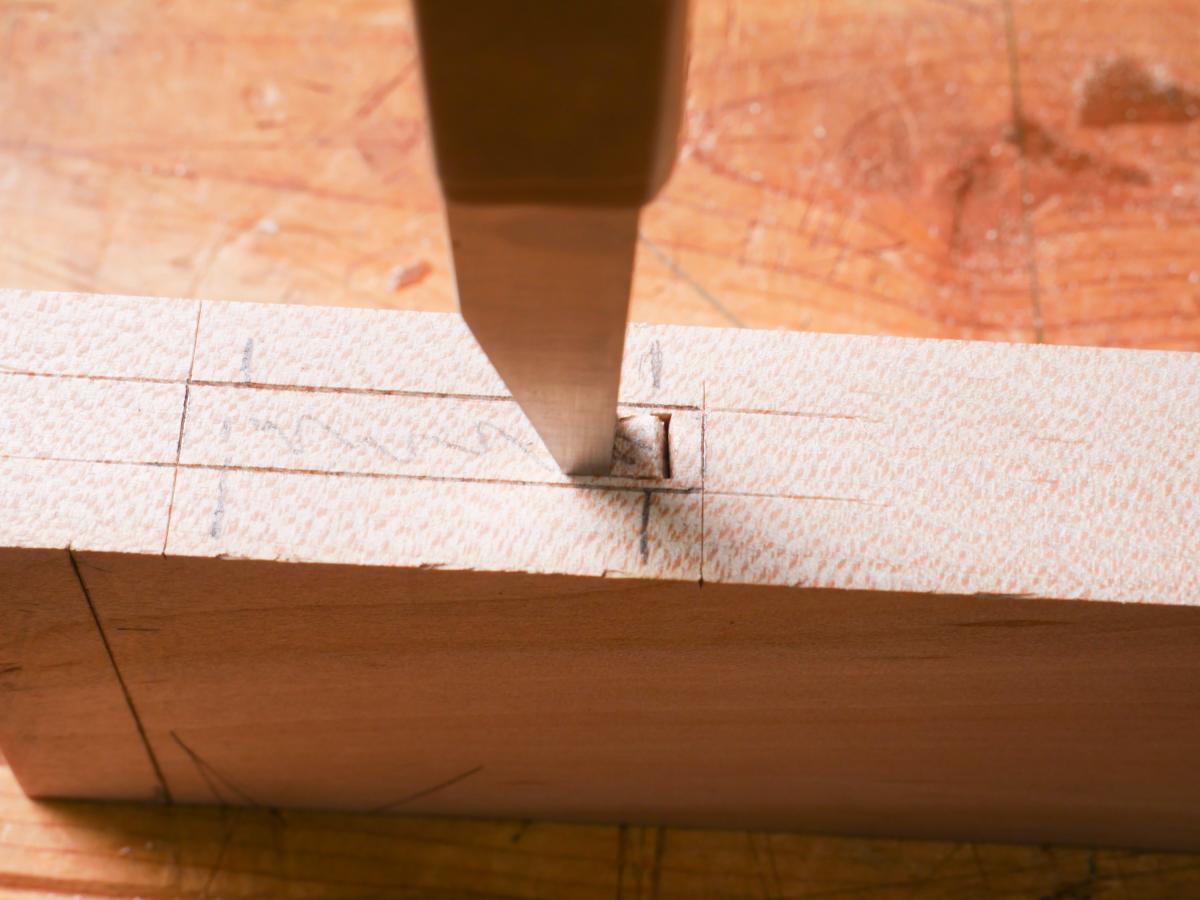
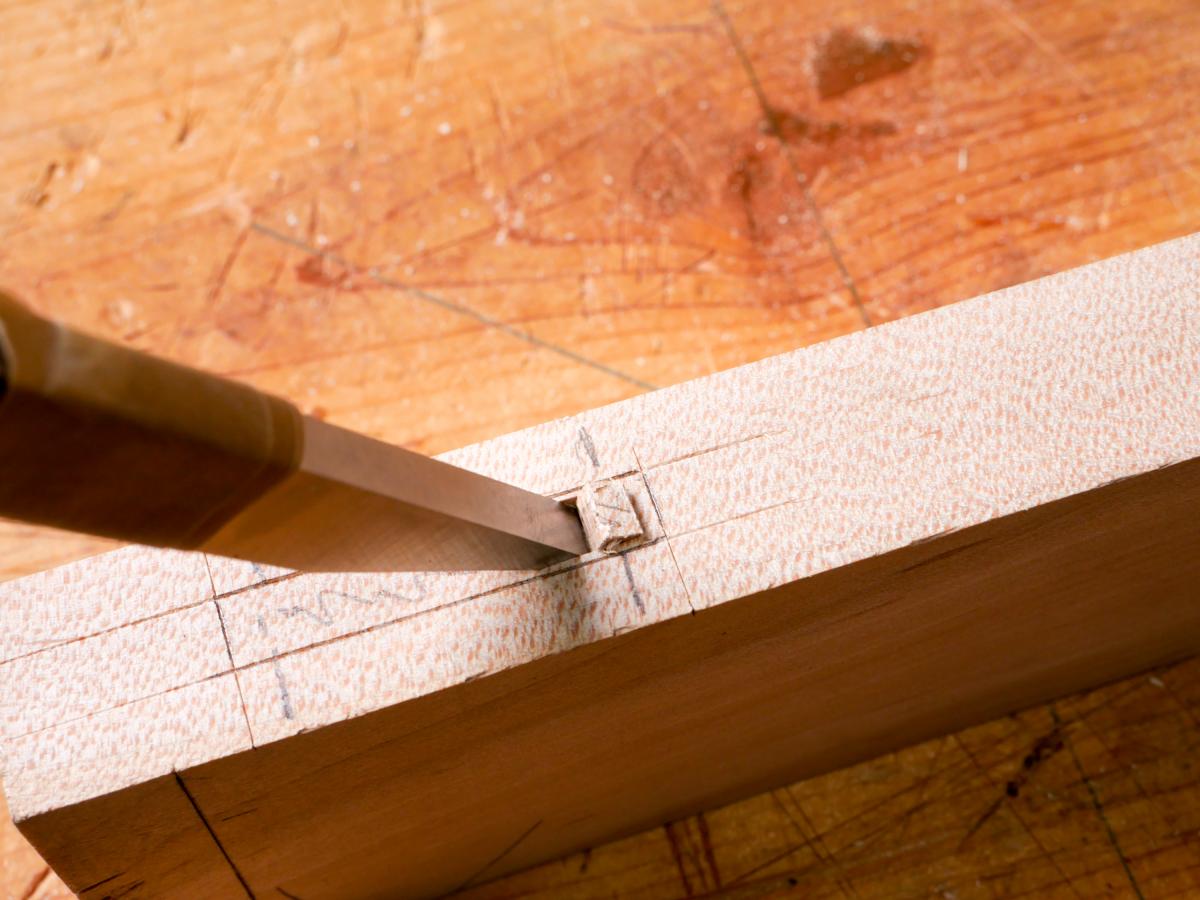
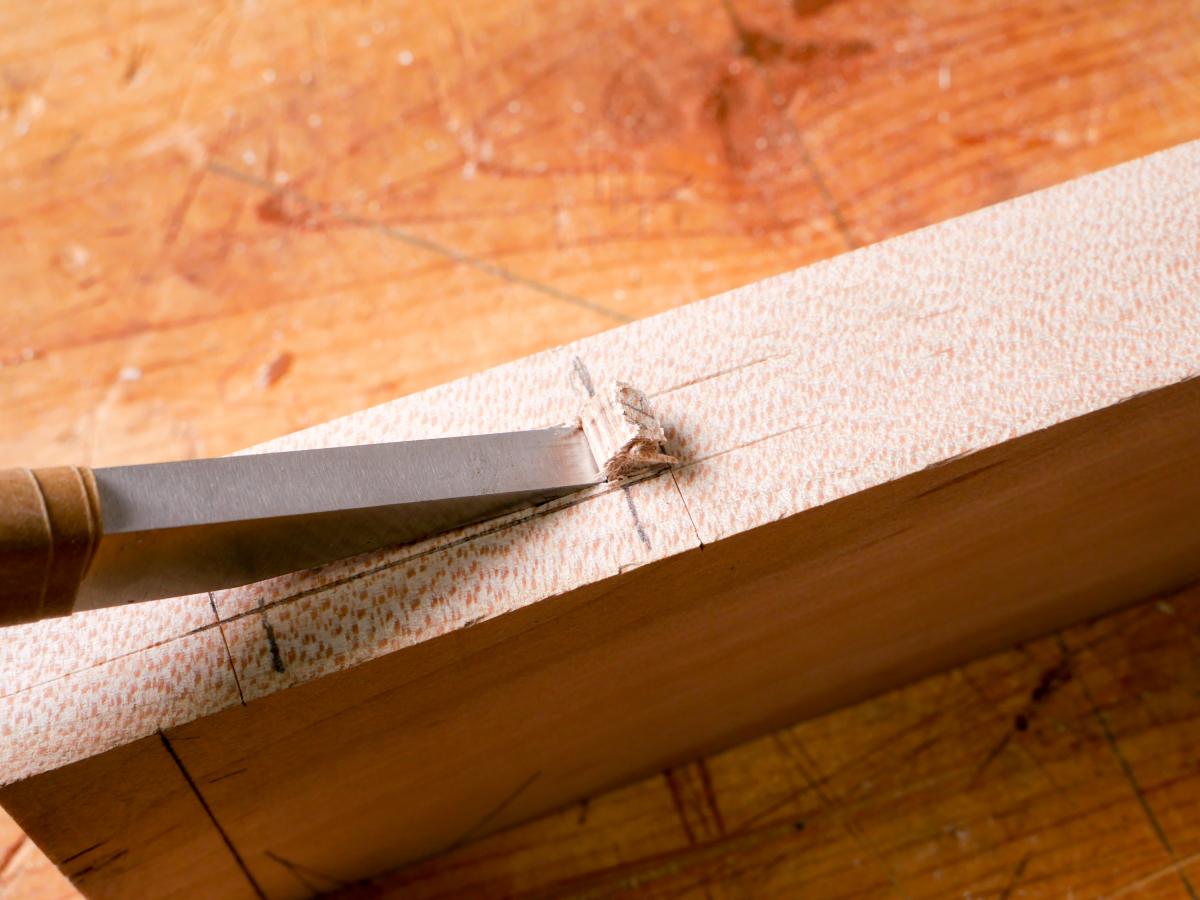
Finally I am at the depth I want. Then, and only then, will I chop the ends of the mortise to the final length.
The final step is putting a paring chisel on the each scribe line and pressing down. Long paring chisels are easy to hold vertically. Ideally you want one the width of your mortise. For this mortise I used a 1" bench chisel that I had in the showroom. I have wider and longer chisels but not with me on that day. More importantly, I think a 1" bench chisel is pretty typically the widest chisel in a lot of workshops. It just requires a few more passes.
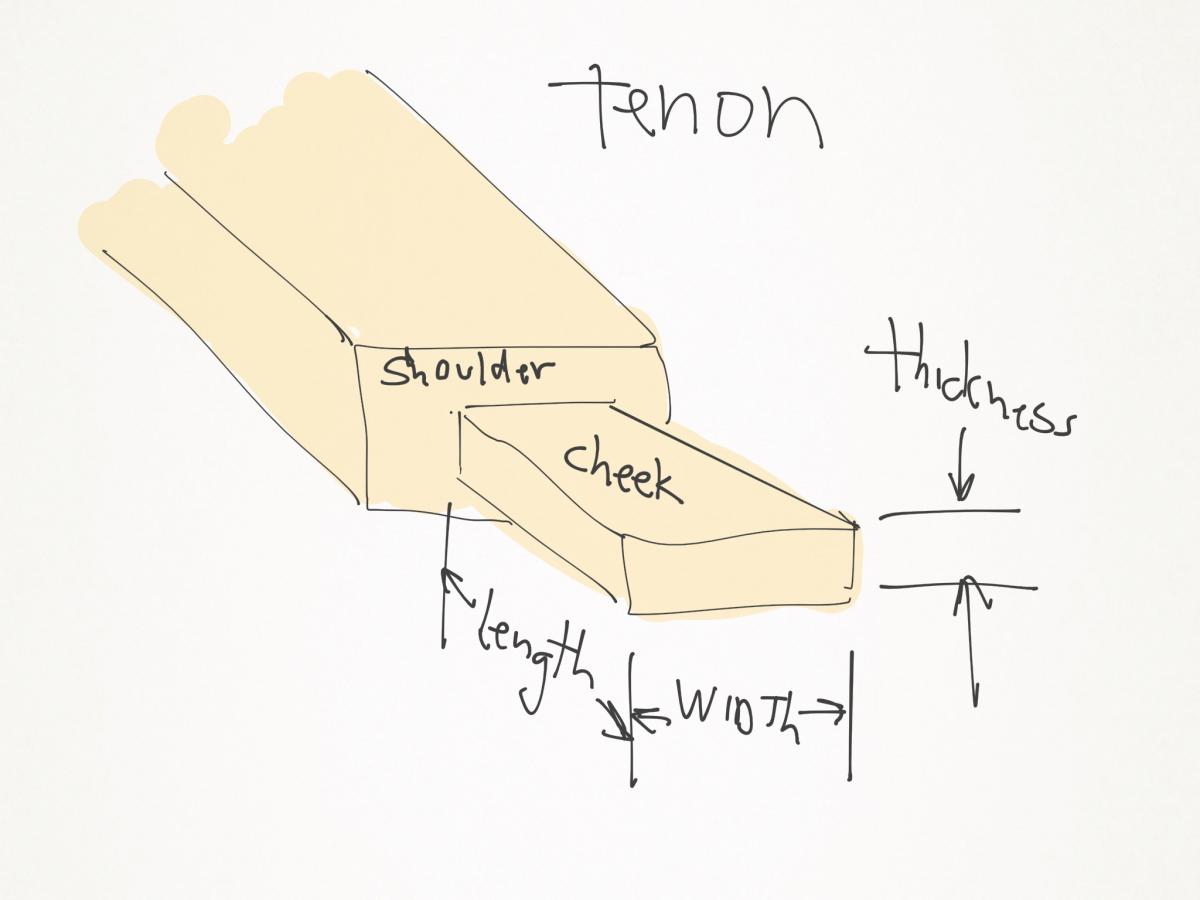
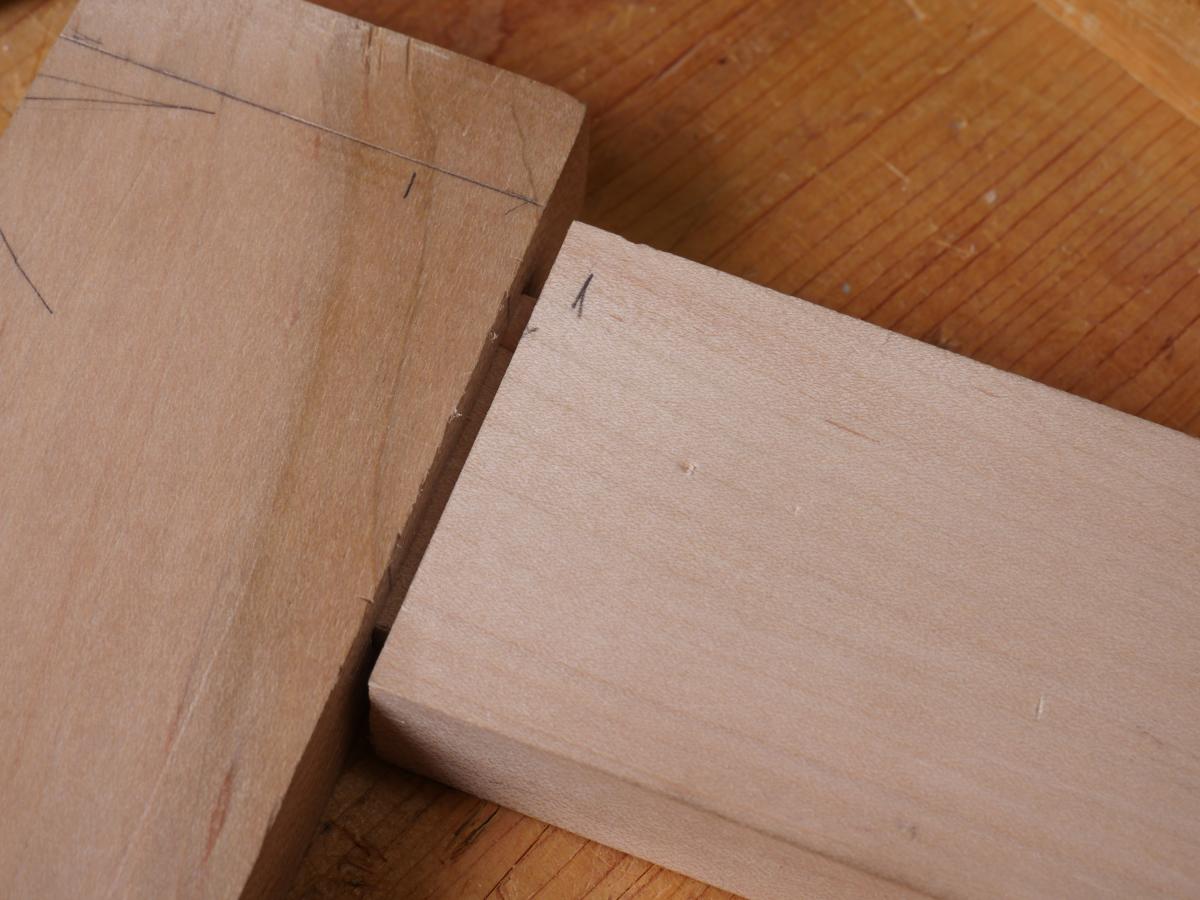
I chamfered the edge of the tenon and then did a test assembly. The first time I tried to bang it together, it didn't go all the way down becauseI had not fully removed enough material out of the bottom of the mortise. End grain has no glue strength so it doesn't matter if the tenon is short a little. It's a good thing it leaves room for glue, but obviously the bottom has to be clean enough so that the mortise and tenon fit together all the way. In retrospect, I think I would have had almost as strong a joint but a lot easier time of chopping and levering waste if I made the tenon a little shorter and the mortise not as deep.
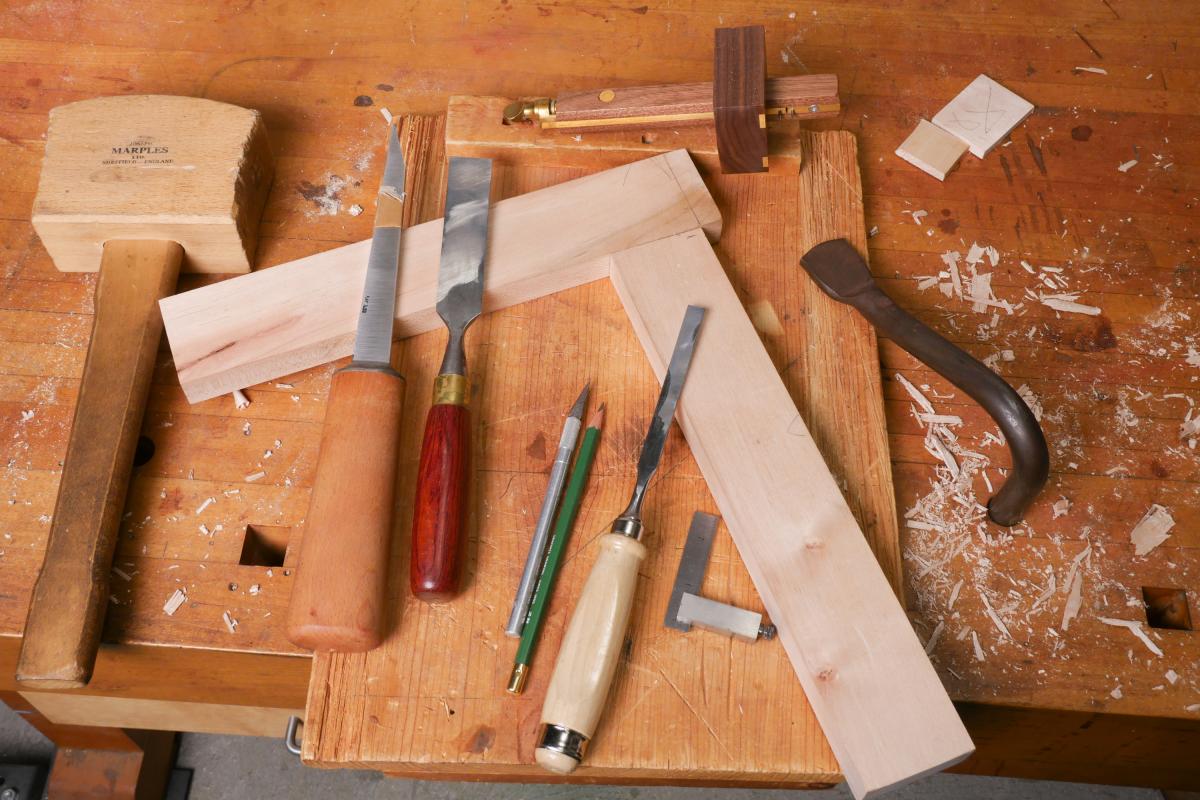
The main picture shows all the tools I used in this project - with the exception of a Starrett 12" Combination Square (I forgot I used it). For the mortise I ended up using the much smaller Starrett 14D Double Square - but both work. You can also pre-drill the waste. A Forstner bit in a drill press works really well for that. Totally hand done mortises have two real advantages. First, the number off tools you need are pretty minimal, and you also don't need a drill press. Second, if you can cut a mortise and tenon entirely by hand, doing joints at odd angles - perhaps for a chair, or for some modern design - is pretty easy. You have to pay attention but the basic skills of layout, accurate sawing and chopping are identical.
And basic skills of layout, accurate sawing and chopping are as essential to the woodworker as they were in Moxon's time, so long ago.
|
Join the conversation |
|


 Joel's Blog
 Built-It Blog
 Video Roundup
 Classes & Events
 Work Magazine
I own 3 of the English mortising chisels. I like them and will be purchasing more when they are available. The "oval" shape of the handle really helps me keep them "square" to the wood.