


Short Guide to Mortise and Marking Gauges
We carry a fairly diverse range of gauges.
Click here for the entire Mortise and Marking Gauge department
Click here for tips on using marking gauges
Some basic terminology about marking gauges:
 A marking gauge has a fence that can be moved and locked
along a beam. There is a single pin to scribe one line. It is used primarily
for scribing tenons and dovetail shoulder lines, and occasionally to mark
out a rabbet. The pin is fixed and the fence slides to the correct location
on the beam and then is locked in place. There are dozens of mechanisms
for locking the fence on the beam, some using a captured wedge but more
likely some sort of thumbscrew.
A marking gauge has a fence that can be moved and locked
along a beam. There is a single pin to scribe one line. It is used primarily
for scribing tenons and dovetail shoulder lines, and occasionally to mark
out a rabbet. The pin is fixed and the fence slides to the correct location
on the beam and then is locked in place. There are dozens of mechanisms
for locking the fence on the beam, some using a captured wedge but more
likely some sort of thumbscrew.
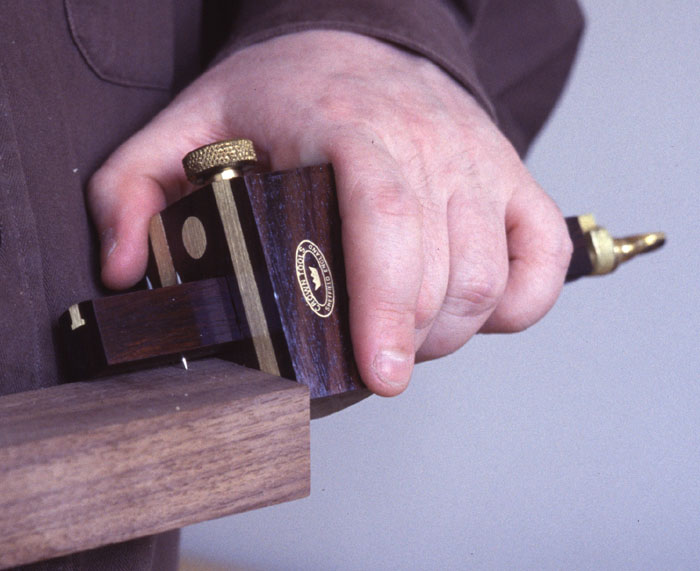
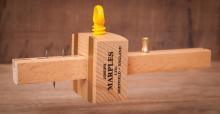 A mortise gauge has 2 pins to scribe both sides of a mortise
simultaneously. Some mortise gauges, called combination mortise gauges,
have single pin on the other side so you can use it as a regular marking
gauge, and other types allow you to retract one pin into the fence, for
the same reason. If you have trouble getting both pins to scribe evenly,
check that both pins are at the same height. If they aren't, file one
down slightly. Depending on the design, the movable pin is adjusted by
means of a slider or a screw adjuster. The advantage of the screw adjuster
is that the movable pin will stay put, independent of later fence adjustments.
However, this convenience comes at a greater cost and complexity of mechanism.
A mortise gauge has 2 pins to scribe both sides of a mortise
simultaneously. Some mortise gauges, called combination mortise gauges,
have single pin on the other side so you can use it as a regular marking
gauge, and other types allow you to retract one pin into the fence, for
the same reason. If you have trouble getting both pins to scribe evenly,
check that both pins are at the same height. If they aren't, file one
down slightly. Depending on the design, the movable pin is adjusted by
means of a slider or a screw adjuster. The advantage of the screw adjuster
is that the movable pin will stay put, independent of later fence adjustments.
However, this convenience comes at a greater cost and complexity of mechanism.
(Note: we typically carry many different styles of the same gauge with different features at different prices. The gauge illustrated and linked at left is just one specific mortise gauge that we are using to illustrate the genre.)
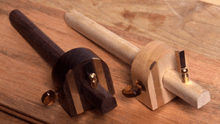 A cutting gauge is a marking gauge with a knife
instead of a pin. Basically, the theory behind this distinction is that
cutting across grain with a knife is better than using a pin. Since the
pin must be pretty sharp, I don't see much of a difference in use, although
I personally I prefer the pin. Nevertheless, a cutting gauge does come in
handy with delicate operations, such as dealing with veneers.
A cutting gauge is a marking gauge with a knife
instead of a pin. Basically, the theory behind this distinction is that
cutting across grain with a knife is better than using a pin. Since the
pin must be pretty sharp, I don't see much of a difference in use, although
I personally I prefer the pin. Nevertheless, a cutting gauge does come in
handy with delicate operations, such as dealing with veneers.
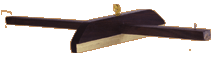 A panel gauge is basically a long marking gauge
with a beam that can go from a foot to several feet long, depending on the
application. A panel gauge's major use is in scribing boards to the correct
width. In the old days, before table saws and accurate rip fences, after
planing one edge of a board true you would use a panel gauge to scribe a
parallel line for the width of the board. Then you'd saw and plane to that
line. Panel gauges are also extremely handy for marking locations in the
center of a panel. These days in a modern shop they aren't used much, but
when you need one they can make layout much faster.
A panel gauge is basically a long marking gauge
with a beam that can go from a foot to several feet long, depending on the
application. A panel gauge's major use is in scribing boards to the correct
width. In the old days, before table saws and accurate rip fences, after
planing one edge of a board true you would use a panel gauge to scribe a
parallel line for the width of the board. Then you'd saw and plane to that
line. Panel gauges are also extremely handy for marking locations in the
center of a panel. These days in a modern shop they aren't used much, but
when you need one they can make layout much faster.
Tips
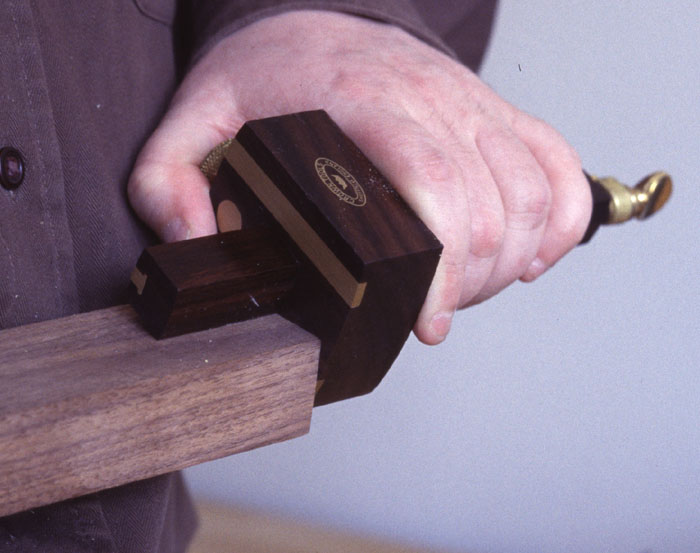
To control the amount of pressure on the pin so that you get a consistent scribe line, rest one edge of the entire length of the beam on the work and then tilt the beam until the pin makes contact with the work. Using the beam to control the amount of pressure on the pin makes a world of difference.
Don't run a gauge off the end or a board - this can cause splintering. Instead you should stop scribing before you reach the other end. At that point, you should start again from the other edge and meet your line in the middle (at the same setting but from the opposite direction).
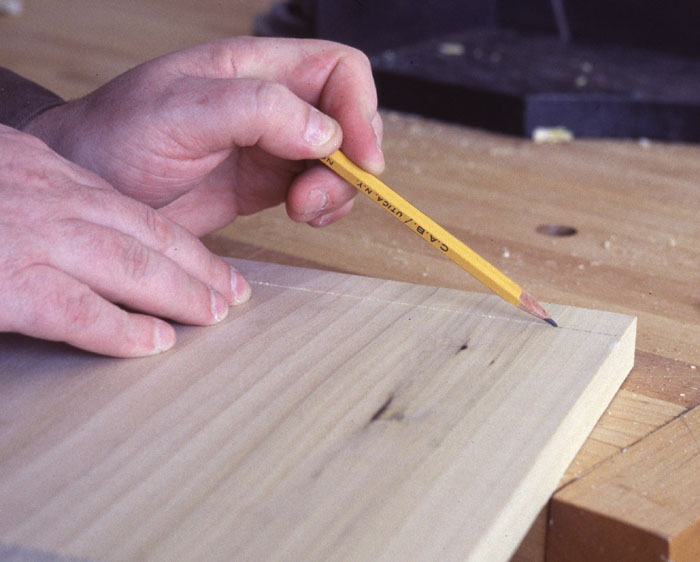
If you have trouble seeing the scribed line, take a very sharp pencil, place the point in the scribed line at a slight angle to the wood and pull it along the scribed line. Let the scribe guide the pencil. This will leave a little lead on both edges of the scribe so you can see it better. For an even finer line, you can go over the penciled (scribed) line with an eraser. What's left will be a penciled line that is very precise (you've erased the excess graphite) yet still easy to read.
Marking and mortise gauges are some of the most used measuring tools in the shop, and consequently we stock a fair selection. One of the most important concepts in woodwork is the idea of referencing measurements. It rarely matters what the exact measurement is - 0.500" as opposed to 0.560"; the important thing is that the measured parts are consistent, and the marked lines are truly parallel. So gauges are used not to set specific lengths, but rather to allow you to take measurement from one item and transfer it exactly to another, without actually needing to know the exact measurement. For example, the way to set a marking gauge for scribing a line for dovetailing is to set the gauge on one piece, with the fence on one side so that the pin just goes over the other side. Then lock the gauge. This gives you a perfect line to scribe - the exact width of the wood plus a little extra for planing the dovetails flush.
When you start out a good combination mortise gauge is the most versatile tool to have. However, as you get involved in more complicated projects, having a bunch of gauges whose settings you can maintain for the duration of a project is very handy. Even though a combination gauge can be used as both a mortise gauge and a marking gauge, I typically have a mortise gauge set for the mortise and stock I'm using, and a different marking gauge to hold the setting for the tenon length. This way I can go back and forth with the identical settings without worrying about tiny differences that can cause trouble. Once I set the gauge, I put masking tape over the thumbscrew as a reminder so I know it's set.
Click here for the entire mortise and marking gauge department
|
Hours: M-F 9:00-5:00, closed Sat,Sun Our Guarantee & Return Policy Shipping and Sales Tax Info Privacy Policy Holiday Calendar |
|
Contact Us:
Email: support@toolsforworkingwood.com Phone: 800-426-4613 or 718-499-5877 Visit Us in Brooklyn: Directions to Our Showroom © 1999-2026 toolsforworkingwood.com Powered by 01 Inc. Coded entirely in NYC |